
In This Article
Picture this—you’re cruising down the highway, wind in your face, and every patch on your leather tells a story that words never could. That’s the power of motorcycle jacket patches. They’re not just decorative add-ons; they’re visual autobiographies that speak the language of the road.
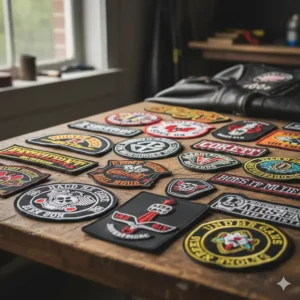
Whether you’re a lone wolf rider or a proud club member, the patches you choose become part of your identity. From commemorating epic cross-country rides to displaying club loyalty, each stitch carries meaning. The motorcycle patch culture dates back to post-World War II America, when veterans formed clubs and adopted military-style insignia to recreate the camaraderie they experienced during service. Today, this tradition continues stronger than ever, with the embroidered patch market reaching over $100 million annually.
In this guide, I’ll walk you through the absolute best motorcycle jacket patches available in 2025—from budget-friendly iron-ons to premium custom rockers that’ll make your vest the envy of every rally. You’ll discover which patches withstand brutal weather, how to choose between sew-on and iron-on options, and what makes a patch worthy of your riding gear.
Quick Comparison Table: Top Motorcycle Jacket Patches at a Glance
| Patch Name | Type | Price Range | Best For | Rating |
|---|---|---|---|---|
| AI-NEEL Custom Rocker Patches | Iron/Sew-On | $8-$12 | Custom Club Names | ⭐⭐⭐⭐ 4.5/5 |
| QIMAMADE 2PC Custom Patches | Iron/Sew-On | $10-$15 | Personalized Names | ⭐⭐⭐⭐⭐ 4.8/5 |
| Crazy Novelty Guy States Map | Embroidered | $7-$10 | Travel Tracking | ⭐⭐⭐⭐ 4.3/5 |
| Freedom Biker Top Rocker | Iron/Sew-On | $9-$13 | Large Back Patches | ⭐⭐⭐⭐ 4.4/5 |
| YLY 40pcs Slogan Set | Iron/Sew-On | $12-$18 | Funny/Variety | ⭐⭐⭐⭐⭐ 4.7/5 |
| WalnutKing Pre-Patched Vest | Complete Vest | $45-$65 | Ready-to-Wear | ⭐⭐⭐⭐ 4.2/5 |
| PatchStop Custom Design | Embroidered | $15-$35 | Premium Quality | ⭐⭐⭐⭐⭐ 4.9/5 |
💬 Just one click – help others make better buying decisions too! 😊
Top 7 Motorcycle Jacket Patches: Expert Analysis
1. AI-NEEL 2PC Custom Motorcycle Biker Patches
If you’re looking for AI-NEEL 2PC Custom Motorcycle Biker Patches, you’ve found a winner. These personalized rocker name patches are designed specifically for riders who want their club name or personal motto displayed prominently across their vest.
Key Specifications:
- Size: 13″ wide x 5″ high (top and bottom rockers)
- 50% embroidered with heat seal glue backing
- Available in multiple color combinations
The dual-backing system is genius—you can either iron these onto denim or sew them onto leather without damaging your jacket. One rider mentioned applying them to his club vest and they’ve held up through two riding seasons and countless washes.
✅ Pros:
- Fully customizable with your text
- Generous size for visibility
- Dual application method (iron/sew)
❌ Cons:
- Requires careful ironing technique
- Color bleeding possible with markers
Price: $8-$12 | Best For: Club members needing custom rockers

2. QIMAMADE 2 PCS Custom Patch Set
The QIMAMADE custom embroidered patches are professional-grade quality at a reasonable price. These XL-sized patches feature crisp embroidery on durable PVC fabric that won’t fade or wash off.
Key Specifications:
- Material: 600 denier PVC fabric with polyester thread
- Application: Iron-on or sew-on
- Customization: Top and bottom rocker configuration
What sets QIMAMADE apart is the embroidery quality. The stitching is dense and well-executed, creating designs that pop against black backgrounds. Customers consistently praise how the patches maintain their appearance even after machine washing (turned inside-out, of course).
✅ Pros:
- Superior embroidery density
- Highly durable PVC backing
- Easy customization process
❌ Cons:
- Limited to black color base
- Slightly higher price point
Price: $10-$15 | Best For: Riders wanting premium custom patches
3. Crazy Novelty Guy States Traveled Map Patch
For the adventure-minded rider, the Crazy Novelty Guy States Traveled Map patch is pure genius. This 4.5″ x 3″ embroidered patch features a detailed USA map where you can color in states as you conquer them.
Key Specifications:
- Made in the USA
- Larger size for easier coloring
- High-quality embroidered borders
One rider shared that she and her husband bought matching patches to track their cross-country journey—it’s become a cherished visual diary of their travels. Pro tip: use fine-tip permanent markers instead of Sharpies to prevent bleeding across state lines.
✅ Pros:
- Interactive travel tracking
- USA-made quality
- Conversation starter at rallies
❌ Cons:
- Missing Michigan’s upper peninsula
- Markers can bleed if not careful
Price: $7-$10 | Best For: Cross-country touring enthusiasts
4. Freedom Biker Patches Top Rocker
The Freedom Biker Patches top rocker delivers exactly what serious riders need—a bold, highly visible patch that commands respect. At 13″ wide and 5″ high, this isn’t a patch that whispers; it shouts your presence.
Key Specifications:
- 50% embroidery coverage
- Super strong heat seal backing
- Multiple color options available
The versatility here is impressive. Whether you’re decorating sweatshirts, denim shirts, baseball caps, or leather vests, these patches adapt to whatever surface you’re working with. The heat seal backing creates a bond that survives both weather and washing machines.
✅ Pros:
- Extremely visible size
- Versatile application
- Strong adhesive backing
❌ Cons:
- Requires precise iron temperature (150°F)
- 15-25 second application time needed
Price: $9-$13 | Best For: Large back rocker applications
5. YLY Iron On Patch 40-Piece Slogan Set
Sometimes you don’t want one statement—you want options. The YLY 40pcs Assorted Funny Slogan Patches delivers variety that lets you mix, match, and express different moods depending on the ride.
Key Specifications:
- 40 different designs in one pack
- Iron-on and sew-on compatible
- Includes funny slogans, letters, and symbols
This variety pack is perfect for customizing multiple pieces of gear. Use humorous patches on your casual riding jacket and save the serious ones for your club vest. One customer mentioned using them across three different jackets, backpacks, and even jeans—talk about getting your money’s worth.
✅ Pros:
- Incredible variety (40 designs)
- Cost-effective per patch
- Great for experimenting with placement
❌ Cons:
- Not all designs appeal to everyone
- Smaller individual patch sizes
Price: $12-$18 | Best For: Riders wanting design flexibility
6. WalnutKing Men Leather Motorcycle Jacket Vest
If you prefer the grab-and-go approach, the WalnutKing pre-patched leather vest removes all guesswork. These vests come with carefully curated patch designs already applied, creating a cohesive, professional look right out of the box.
Key Specifications:
- Genuine leather construction
- Multiple unique embroidered patches pre-attached
- Available in various sizes
While this option costs more than individual patches, you’re paying for convenience and design coordination. Each vest features complementary patch designs that work together visually—something that’s harder to achieve when building from scratch.
✅ Pros:
- No application required
- Professionally coordinated designs
- Leather quality construction
❌ Cons:
- Higher price point
- Limited customization options
Price: $45-$65 | Best For: Riders wanting instant style
7. PatchStop Custom Embroidered Designs
When only the absolute best will do, PatchStop represents the gold standard in custom motorcycle patches. As self-proclaimed “The World’s Largest Patch Store,” they’ve earned their reputation through decades of quality craftsmanship.
Key Specifications:
- 100% custom embroidery
- Choice of sizes and backing types
- Professional design assistance available
PatchStop specializes in creating unique patches that stand apart from mass-produced options. Whether you need club colors, memorial patches, or completely original artwork, their design team collaborates directly with you. The embroidery quality is noticeably superior, with vibrant thread colors and exceptional detail work.
✅ Pros:
- Museum-quality embroidery
- Full customization freedom
- Expert design consultation
❌ Cons:
- Premium pricing
- Longer production timeline
Price: $15-$35 | Best For: Custom club patches and special commemorations
Understanding Motorcycle Patch Culture and History
Before you start decorating your vest, understanding the rich history of biker patches helps you navigate this tradition with respect. The culture surrounding motorcycle jacket patches runs deeper than most people realize, with roots stretching back to the 1940s.
The Post-WWII Origins
When veterans returned from World War II, many struggled to adjust to civilian life. The camaraderie, adrenaline, and brotherhood they experienced during wartime couldn’t be easily replaced. Motorcycles offered freedom, and forming clubs recreated that sense of belonging. These early clubs borrowed from military tradition, adopting patch systems similar to unit insignia.
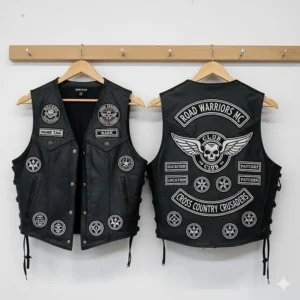
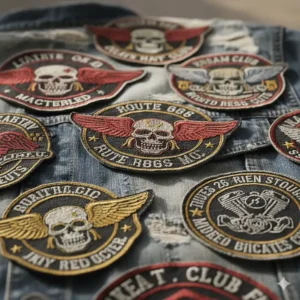
The Three-Piece Patch System
The iconic three-piece patch became standardized during the 1950s and 1960s. This configuration consists of:
Top Rocker: Displays the club name in an arc across the upper back
Center Patch: Features the club’s emblem or logo—the most recognizable element
Bottom Rocker: Indicates the geographic territory or chapter
This three-piece system isn’t just decorative—it signifies earned membership in a traditional motorcycle club. The American Motorcyclist Association recognizes one-piece patches for family-oriented clubs, deliberately differentiating them from the three-piece format associated with outlaw clubs.
Modern Patch Meanings
Today’s motorcycle jacket patches communicate various messages:
⚡ Club Affiliation: Primary patches show which organization you belong to
🏆 Achievements: Event patches commemorate rides, rallies, or milestones
🎖️ Rank: Officer patches indicate leadership positions
💀 Memorial: Tribute patches honor fallen riders
🇺🇸 Values: Patriotic or philosophical patches express personal beliefs
Understanding these meanings prevents cultural missteps. Wearing a three-piece patch without earning it through club membership can cause serious confrontations within the motorcycle community.
Types of Motorcycle Jacket Patches Every Rider Should Know
Iron-On vs Sew-On Patches
The application method you choose depends entirely on your riding gear material and how permanent you want the attachment.
Iron-On Patches:
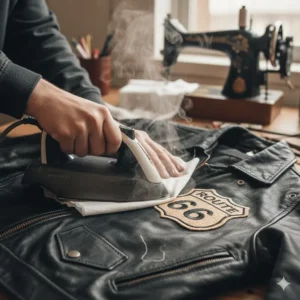
These feature heat-activated adhesive on the back. They’re perfect for cotton, denim, canvas, and cotton blends. The application process takes about 15-25 seconds with an iron set to 150°F. However, iron-on patches aren’t recommended for leather—the heat can damage the material, and the adhesive won’t bond properly to leather’s smooth surface.
Sew-On Patches:
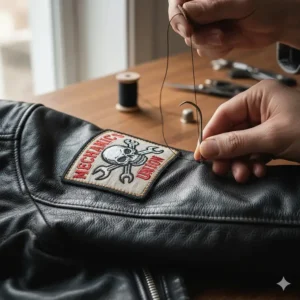
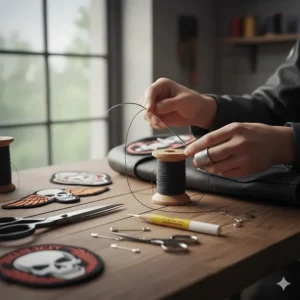
Traditional stitching creates the most secure, permanent attachment. This method works on any material, including leather, synthetic fabrics, and delicate materials that can’t handle heat. While more time-consuming, sewing prevents patches from peeling off during harsh weather or frequent washing. Many riders choose to sew even iron-on patches for maximum durability.
Rocker Patches
Curved patches designed for the top and bottom positions on your vest back. Top rockers typically display your club name, while bottom rockers show your territory or chapter. These are usually 11-13 inches wide and create that classic biker look.
Back Patches
The centerpiece of your vest, these large emblems (often 8-12 inches) represent your club’s identity or personal brand. They’re the most eye-catching element and require careful positioning for maximum impact.
Event Patches
Commemorative patches prove you attended specific rallies, charity rides, or gatherings. Sturgis, Daytona Bike Week, and Laconia Motorcycle Week patches are highly collectible. Building a collection documents your riding history visually.
Memorial Patches
These honor fallen brothers and sisters of the road. Worn with deep respect, they typically include the rider’s name, nickname, and years. Many clubs have strict protocols about memorial patch placement and design.
Funny Patches
Not everything needs to be serious. Humorous patches add personality and lighten the mood. Popular sayings like “If You Can Read This, The B*tch Fell Off” or “Loud Pipes Save Lives” inject fun into the riding culture.
How to Choose the Perfect Motorcycle Jacket Patches
Selecting the right patches involves balancing personal expression with cultural awareness. Here’s your step-by-step selection guide:
Step 1: Identify Your Purpose
Are you expressing club membership, documenting travels, sharing humor, or making a statement? Your primary goal determines which patch types make sense. Club members need rockers and center patches. Independent riders have more creative freedom.
Step 2: Consider Your Jacket Material
Leather requires sewing. Denim handles both iron-on and sew-on methods. Synthetic materials need careful temperature testing before ironing. Match your patch application method to your gear’s material requirements.
Step 3: Evaluate Quality Markers
Look for dense embroidery coverage (75-100% is ideal), quality backing material, vibrant thread colors, and clean edge work. Cheap patches with 50% or less embroidery coverage typically feature simple designs and won’t last through multiple seasons.
Step 4: Plan Your Layout
Sketch your vest or jacket on paper and arrange patches before committing. Consider visual balance, readability from a distance, and whether designs complement or clash with each other. Traditional placement follows specific patterns—large back patch centered, rockers above and below, smaller patches on shoulders and chest.
Step 5: Respect Cultural Boundaries
Never replicate a club’s three-piece patch configuration unless you’re a member. Avoid using symbols or designs that belong to specific organizations. When in doubt, ask experienced riders or club members about whether a design crosses lines.
Step 6: Test Application Methods
Before ironing patches onto your favorite jacket, practice on scrap fabric. Test iron temperature, pressure, and duration. For sewing, use strong thread (polyester or nylon) and ensure stitches are tight and even.
Step 7: Buy Quality Over Quantity
One exceptional patch makes a bigger statement than ten cheap ones. Invest in well-crafted patches that’ll survive years of riding. Quality patches justify their higher cost through longevity and appearance.
Application Techniques: Iron-On vs Sew-On Methods
Iron-On Application (For Denim, Cotton, Canvas)
What You’ll Need:
- Household iron
- Thin cotton cloth or pillowcase
- Flat, heat-resistant surface
- Your patch and garment
Step-by-Step Process:
- Preheat: Set your iron to 150°F (cotton setting) with no steam
- Position: Place your garment on a flat surface and position the patch exactly where you want it
- Protect: Cover the patch with a thin cotton cloth to prevent direct heat contact
- Apply Heat: Press down firmly with the iron for 15-25 seconds, using backward and forward motion
- Cool: Let the patch cool completely (about 15 minutes) before handling
- Test: Gently try to lift the patch edges—if they come up, repeat the heating process
Pro Tips:
- Turn garments inside-out for machine washing
- Don’t use iron-on method on leather—you’ll ruin both the patch and jacket
- Some patches require sewing around edges even after ironing for maximum security
Sew-On Application (For All Materials, Especially Leather)
What You’ll Need:
- Strong thread (polyester or nylon)
- Sharp needle suitable for your fabric
- Thimble (especially for leather)
- Pins or fabric chalk for marking
Step-by-Step Process:
- Mark Position: Use pins or chalk to mark exactly where the patch goes
- Thread Selection: Choose thread that matches the patch edge color
- Stitch Type: Use a whip stitch or blanket stitch around the entire perimeter
- Spacing: Keep stitches evenly spaced (about 1/4 inch apart)
- Secure: Double-back at start and finish to prevent unraveling
- Finish: Tie off thread on the inside of the garment
Leather-Specific Tips:
- Pre-punch holes with an awl for easier needle penetration
- Use curved needles designed for leather work
- Apply leather conditioner around the patch area after sewing to prevent cracking
Patch Placement Etiquette: Where Each Type Belongs
Proper patch placement isn’t just about aesthetics—it communicates respect for motorcycle culture traditions. Here’s the roadmap:
Back Panel (The Prime Real Estate)
Top Rocker Position: Curved across the upper back, about 2 inches below the collar
Center Patch Location: Largest patch positioned centrally between the rockers
Bottom Rocker Spot: Curved across the lower back, typically 4-6 inches from the vest hem
This three-piece configuration should ONLY be used by legitimate club members. Independent riders use single large patches or multiple smaller designs instead.
Shoulder Placements
Left and right shoulders are perfect for smaller patches (2-4 inches). These spots work well for:
- Military service patches
- Riding club affiliations (non-MC)
- State or flag patches
- Support patches for causes
Chest Area
The left chest traditionally displays your name or nickname patch. The right chest can feature event patches, funny sayings, or brand logos. Keep chest patches relatively small (3 inches maximum) for visual balance.
Sleeve Positions
Upper sleeves accommodate memorial patches, additional club affiliations, or decorative designs. Lower sleeves near the cuff can display year patches or small logos.
Front Lower Panel
This area below the chest pockets is ideal for longer horizontal patches or multiple small designs arranged vertically.
What to NEVER Do
❌ Don’t copy another club’s three-piece configuration
❌ Don’t touch another rider’s patches without permission
❌ Don’t wear club colors you haven’t earned
❌ Don’t place patches upside-down or sideways
❌ Don’t mix incompatible messages or allegiances
Maintaining and Caring for Your Patches
Your patches represent significant investment—both financially and sentimentally. Proper care ensures they remain vibrant through countless miles.
Washing Guidelines
Hand Washing (Safest Method):
- Fill basin with cold water and mild detergent
- Submerge the garment and gently agitate
- Focus on cleaning around patches rather than directly scrubbing them
- Rinse thoroughly with cold water
- Air dry flat or hanging—never use a dryer
Machine Washing (When Necessary):
- Turn the garment completely inside-out
- Use cold water only
- Select gentle/delicate cycle
- Use mild detergent—avoid bleach or harsh chemicals
- Remove promptly when cycle completes
- Air dry away from direct sunlight
Storage Best Practices
🧥 Hang vests and jackets on padded hangers to prevent patch distortion
🌡️ Store in cool, dry locations away from direct sunlight
💨 Ensure proper air circulation to prevent mildew
🔒 Keep in garment bags for long-term storage
Repair and Touch-Ups
When patch edges start lifting:
- For iron-on patches: Reapply heat with a protective cloth
- For sewn patches: Add reinforcement stitches around loose areas
- For embroidery damage: Use matching thread to repair small breaks
Weather Protection
Motorcycle jacket patches face brutal conditions—rain, UV exposure, road grime, and temperature extremes. Consider these protective measures:
Waterproofing: Apply fabric protector spray designed for embroidery
UV Protection: Keep jackets covered when parked for extended periods
Cleaning After Rides: Wipe down patches with a damp cloth after muddy or dusty rides

Legal and Cultural Considerations You Must Know
The 1%er Controversy
The diamond-shaped “1%” patch originated from an American Motorcyclist Association statement claiming 99% of motorcyclists are law-abiding citizens. Some clubs embraced the remaining 1% label, wearing it to signify independence from mainstream society. While not inherently illegal, this patch carries heavy implications and should only be worn by those who genuinely understand its meaning and accept its consequences.
Trademark and Copyright Issues
Many motorcycle brands (Harley-Davidson, Indian, Honda) actively protect their logos. Using official brand patches is generally acceptable for personal use, but selling items with these logos without permission violates trademark law. When creating custom patches, ensure your designs don’t infringe on existing intellectual property.
Territory and Respect
Some motorcycle clubs consider specific geographic areas their “territory.” Wearing a bottom rocker that claims a territory where you haven’t been accepted by the dominant club can create serious conflicts. Independent riders should avoid bottom rocker patches entirely or use non-territorial designations.
Veteran and Military Patches
Stolen valor laws make it illegal to wear military medals, ribbons, or qualification badges you haven’t earned. This extends to motorcycle patches claiming military service. Only wear service patches if you’ve legitimately served. The motorcycle community takes military service seriously and will call out frauds.
Support Patches
“Support” patches show allegiance to specific clubs without claiming membership. These typically say “Support [Club Name]” and are acceptable for non-members who have permission from that club. Never wear support patches without explicit approval from the club you’re supporting.
Budget Breakdown: What to Expect at Every Price Point
Budget-Friendly ($5-$15)
At this price range, you’ll find:
- Mass-produced iron-on patches
- 50% embroidery coverage
- Basic designs and simple text
- Standard sizing (3-5 inches)
These work perfectly for experimenting with placement, decorating casual riding gear, or adding humor to your collection. Don’t expect them to survive multiple seasons of hard riding.
Mid-Range ($15-$30)
This sweet spot offers:
- 75% embroidery coverage
- Better thread quality and color vibrancy
- Iron-on or sew-on options
- Medium to large sizes (5-10 inches)
Most serious riders invest at this level for their main patches. Quality improves dramatically compared to budget options, and these patches last through years of riding.
Premium ($30-$100+)
Top-tier patches feature:
- 100% embroidery coverage
- Custom designs and personalization
- Exceptional detail work
- Large sizes for back patches
- Professional design assistance
Club colors, memorial patches, and statement pieces justify premium pricing. These are heirloom-quality items you’ll pass down or treasure for decades.
Common Mistakes Riders Make (And How to Avoid Them)
Mistake #1: Choosing Iron-On for Leather
The Problem: Heat from an iron damages leather and the adhesive won’t bond
The Solution: Always sew patches onto leather jackets and vests
Mistake #2: Overcrowding the Vest
The Problem: Too many patches create visual chaos
The Solution: Follow the “less is more” principle—quality over quantity
Mistake #3: Ignoring Cultural Meanings
The Problem: Wearing symbols you don’t understand can cause confrontations
The Solution: Research patch meanings before purchasing and applying
Mistake #4: Poor Quality Thread for Sewing
The Problem: Weak thread breaks during rides, causing patches to fall off
The Solution: Use polyester or nylon thread specifically designed for outdoor gear
Mistake #5: Skipping the Test Run
The Problem: Ruining your favorite jacket with incorrect iron temperature
The Solution: Always test on scrap fabric first
Mistake #6: Washing Too Aggressively
The Problem: Aggressive washing fades embroidery and loosens adhesive
The Solution: Hand wash when possible; if machine washing, use cold water and gentle cycle
Frequently Asked Questions
❓ Can I wear a three piece patch if I'm not in a motorcycle club?
❓ How long do iron on motorcycle jacket patches last?
❓ What's the difference between 50%, 75%, and 100% embroidery coverage?
❓ Can motorcycle jacket patches go through the washing machine?
❓ Where should I place my first patch on a motorcycle vest?
Conclusion: Wear Your Journey with Pride
Motorcycle jacket patches transform ordinary riding gear into personalized storytelling canvases. Whether you’re commemorating epic journeys with state map patches, displaying club loyalty with custom rockers, or adding humor with witty sayings, each patch contributes to your unique identity on the road.
The key takeaways from this guide: invest in quality over quantity, understand cultural meanings before wearing patches, match application methods to your jacket material, and respect the traditions that make motorcycle culture special. The patches you choose today become part of your legacy tomorrow.
From the budget-friendly YLY 40-piece variety set perfect for experimentation to the premium PatchStop custom embroidery that creates heirloom pieces, options exist for every rider and budget. Remember that the best patch isn’t necessarily the most expensive—it’s the one that authentically represents who you are and what you stand for.
So grab your leather, choose your patches wisely, and wear your story with pride. The open road awaits, and your vest is ready to document every mile of the adventure.
✨ Don’t Miss These Exclusive Deals!
🔍 Take your motorcycle style to the next level with these carefully selected patches. Click on any highlighted item to check current pricing and availability. These authentic patches will help you create a riding vest that truly represents your journey!
Recommended for You
- 7 Best Summer Motorcycle Jackets 2025 (Expert Tested & Reviewed)
- 7 Best Padded Motorcycle Jacket Reviews 2025 – Expert Guide
- 7 Best Armored Motorcycle Jackets That Actually Protect You (2025)
Disclaimer: This article contains affiliate links. If you purchase products through these links, we may earn a small commission at no additional cost to you.
✨ Found this helpful? Share it with your friends! 💬🤗