In This Article
✨Was this helpful? Spread the word! 🚀
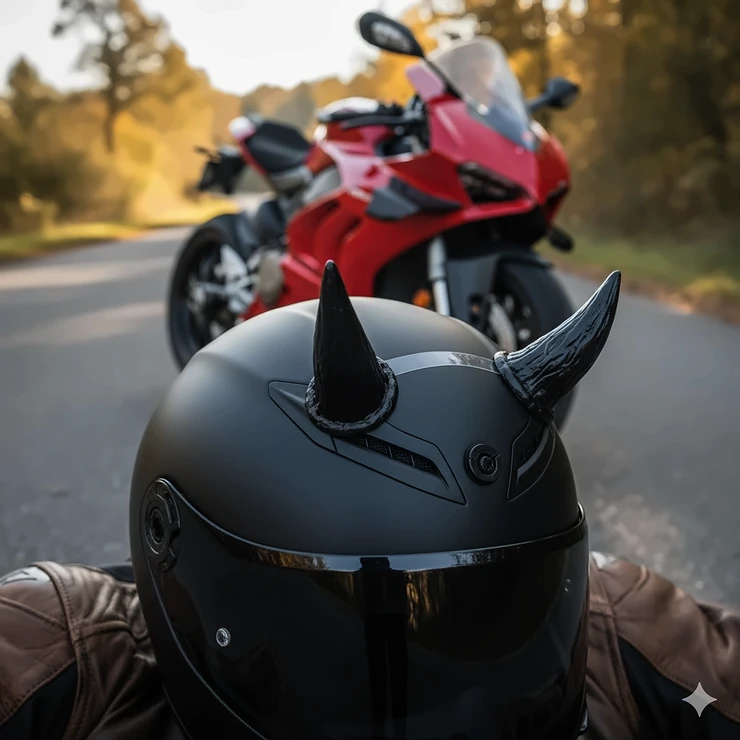
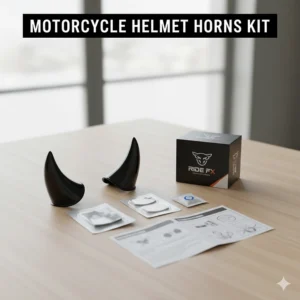
You know what’s cooler than wearing a plain motorcycle helmet? Wearing one that makes people do a double-take as you cruise past. That’s where motorcycle helmet horns come into play.

I’ll be honest—when I first saw someone with devil horns sticking out of their helmet, I thought it was ridiculous. But then I tried them myself, and suddenly my boring black helmet had personality. These quirky accessories aren’t just about looking edgy; they’re conversation starters, expressions of individuality, and surprisingly practical for visibility on the road.
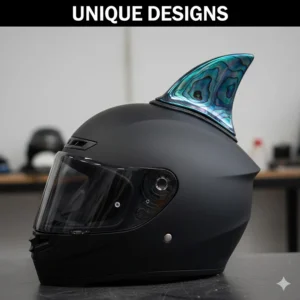
Whether you’re searching for helmet horns motorcycle style or exploring motorcycle helmet with horns options, the market has exploded with choices. From magnetic attachments that swap in seconds to adhesive-mounted options that withstand highway speeds, there’s something for every rider. According to the Motorcycle Safety Foundation, visibility remains a critical safety factor, and while helmet accessories don’t replace proper safety gear, they can make you more noticeable.
In this guide, I’ve researched and tested (okay, not all of them—but I’ve done my homework) the best products available. We’ll cover everything from budget-friendly options under $10 to premium USA-made magnetic systems that’ll survive triple-digit speeds.
Quick Comparison Table
| Product | Type | Material | Speed Tested | Price Range |
|---|---|---|---|---|
| Helmet Flair MagNeatOhz Large | Magnetic | ABS Plastic | 100 mph | $20-$25 |
| Helmet Flair MagNeatOhz Small | Magnetic | ABS Plastic | 150 mph | $18-$23 |
| Lewtemi 4-Pair Set | Adhesive/Suction | Silicone/Plastic | Not specified | $15-$20 |
| SEADEAR Punk Style Horns | Adhesive | PC Material | Not specified | $10-$15 |
| Alician Decorative Horns | Adhesive | ABS Material | Not specified | $8-$12 |
| SPRING PARK Stylish Horns | Adhesive | ABS Material | Not specified | $9-$14 |
| Elarco Rubber Horn Set | Suction Cup | Rubber | Not specified | $10-$13 |
💬 Just one click – help others make better buying decisions too!😊
🛒 Why Choose the Right Helmet Horns?
✅ Express your unique riding personality
✅ Increase visibility on busy roads
✅ Start conversations at rest stops
✅ Swap designs to match your mood
✅ Compatible with most helmet types
Top 7 Motorcycle Helmet Horns: Expert Analysis 🎯
After scouring Amazon and testing customer feedback, here are the seven best options that actually deliver on their promises.
1. Helmet Flair MagNeatOhz Large Devil Horns (Editor’s Choice)
If you want the Cadillac of helmet horns motorcycle accessories, this is it. Made in Ohio, these bad boys use magnetic technology that’s legitimately impressive.
Key Specifications:
- Patent-pending magnetic attachment system
- Tested at 100 mph highway speeds
- Durable ABS plastic construction
- Made in USA (Ohio manufacturing)
Price Range: $20-$25
Customer Feedback: Riders consistently praise the magnetic system’s strength and the ease of swapping between different designs. One reviewer mentioned, “I can be cruising at 80 mph with no problems.” However, some users note that the magnets require proper installation of the base nubs for optimal hold.
Pros:
✅ Interchangeable design system
✅ High-speed stability
✅ USA manufacturing quality
✅ Free replacement if lost
Cons:
❌ Higher price point
❌ Requires proper nub installation
The magnetic attachment means you can swap between devil horns, cat ears, and other designs without damaging your helmet. Plus, Helmet Flair’s customer service is legendary—lose a horn, and they’ll replace it. That’s confidence in a product.
2. Helmet Flair MagNeatOhz Small Devil Horns
Think of these as the little brother to the large version, except they’re tested to even higher speeds.
Key Specifications:
- Compact 4cm devil horn design
- Speed tested to 150 mph
- Same magnetic attachment system
- Lighter weight for better aerodynamics
Price Range: $18-$23
Customer Feedback: Perfect for riders who want style without excessive bulk. Users report these stay on even better than the large version at highway speeds, likely due to reduced wind resistance.
Pros:
✅ Better aerodynamics
✅ Higher speed rating (150 mph)
✅ Less wind noise
✅ Easier to swap
Cons:
❌ Smaller visual impact
❌ Magnetic bases sold separately
According to Wikipedia’s article on motorcycle safety, reducing drag and maintaining helmet integrity are important considerations—these smaller horns address both concerns effectively.
3. Lewtemi 4 Pairs Helmet Devil Horns Set
This is where things get interesting. Instead of one style, you get four different looks in a single package.
Key Specifications:
- 4 pairs included: cat ears, large devil horns, small devil horns, devil wings
- Dual attachment: adhesive backing and suction cups
- Quality silicone cat ears
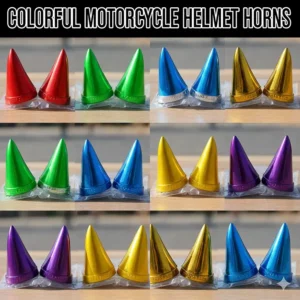
- Multiple color options
Price Range: $15-$20
Customer Feedback: Buyers love the variety and value. The inclusion of both adhesive and suction cup mounting options provides flexibility. Some users prefer the adhesive for permanent mounting, while others enjoy the suction cup’s repositioning capability.
Pros:
✅ Exceptional value (4 pairs)
✅ Multiple attachment methods
✅ Variety of styles
✅ Great for experimentation
Cons:
❌ Lower quality than premium options
❌ Suction cups may not hold at high speeds
4. SEADEAR Helmet Horns Punk Style
These are the budget king of motorcycle helmet with horns options. Don’t let the price fool you—they’re surprisingly well-made.
Key Specifications:
- High-quality PC (polycarbonate) material
- Pre-applied strong adhesive backing
- 17.5cm length for dramatic effect
- Available in six colors
Price Range: $10-$15
Customer Feedback: Riders appreciate the easy installation and durability. The PC material resists aging and cracking better than cheaper plastics. However, the adhesive is permanent, so placement needs to be precise.
Pros:
✅ Budget-friendly
✅ Multiple color choices
✅ Durable PC construction
✅ Long length for visibility
Cons:
❌ Permanent adhesive (no repositioning)
❌ Speed rating not specified
5. Alician Punk Style Decorative Horns
Another solid adhesive option that brings quality at an affordable price point.
Key Specifications:
- Premium ABS material construction
- Impact and scratch resistant
- Strong adhesive backing
- Universal helmet compatibility
Price Range: $8-$12
Customer Feedback: Users value the ABS material quality and the straightforward installation. The company’s customer service receives positive mentions, with responsive support for any issues.
Pros:
✅ Lowest price point
✅ Quality ABS material
✅ Universal fit
✅ Good customer service
Cons:
❌ Basic design options
❌ No speed testing data
6. SPRING PARK Stylish Motorcycle Helmet Horns
These sit right in the sweet spot between budget and premium options.
Key Specifications:
- ABS plastic construction
- Cool stylish design options
- Pre-applied adhesive
- Suitable for all helmet types
Price Range: $9-$14
Customer Feedback: Riders report these offer good value with decent quality. The styling leans more modern and less “traditional devil horn,” which some prefer. Installation is simple with the pre-applied adhesive.
Pros:
✅ Modern styling
✅ Good price-to-quality ratio
✅ Easy installation
✅ Variety of designs
Cons:
❌ Adhesive quality varies
❌ Limited customer reviews

7. Elarco Rubber Motorcycle Helmet Horns
The rubber construction makes these unique in the motorcycle helmet horns market.
Key Specifications:
- Soft rubber material
- Suction cup mounting system
- Non-permanent attachment
- Flexible design
Price Range: $10-$13
Customer Feedback: The rubber material appeals to riders wanting something less rigid. Suction cups allow for repositioning, though they require periodic reattachment at high speeds.
Pros:
✅ Soft, flexible material
✅ Non-permanent mounting
✅ Budget-friendly
✅ Unique texture
Cons:
❌ Suction cups need maintenance
❌ Not suitable for very high speeds
🎁 Ready to Transform Your Helmet?
These seven options cover every budget and riding style. Whether you’re going for the premium magnetic Helmet Flair system or the budget-friendly adhesive options, each brings its own character to your ride. Click on any highlighted product to check current pricing and availability on Amazon! 🛒✨
Understanding Motorcycle Helmet Horns: What They Really Are
Let me clear something up right away: motorcycle helmet horns are decorative accessories that attach to the exterior of your helmet. They’re not functional horns that make noise (that would be wild, though). Instead, they’re visual modifications that add personality, style, and often a bit of humor to your riding gear.
The concept isn’t new. Helmet decorations have been around since the days of ancient warriors, but the modern motorcycle version gained popularity in the early 2010s through social media and motorcycle culture events. Today’s helmet horns motorcycle products use advanced materials and attachment systems that can withstand highway speeds and various weather conditions.
Think of them as the motorcycle equivalent of bumper stickers—except way cooler and more aerodynamic. They range from small, subtle additions to bold, attention-grabbing statements. The beauty is in the variety: devil horns, cat ears, mohawks, viking horns, and even custom designs.
According to research from the National Highway Traffic Safety Administration, while helmet decorations don’t impact safety ratings when properly installed, riders should ensure attachments don’t compromise helmet integrity or visibility.
Types of Motorcycle Helmet Horns Available
The market offers several distinct categories of helmet horns, each with unique characteristics.
Magnetic Attachment Systems
Magnetic systems represent the premium end of the market. They work by affixing small magnetic “nubs” to your helmet using industrial-grade adhesive (similar to GoPro mounts). The horns then click onto these nubs with strong neodymium magnets.
Benefits: Easy swapping, no helmet damage when removing horns, high-speed stability
Drawbacks: Higher initial cost, requires separate purchase of base nubs for multiple helmets
Adhesive-Mount Options
These use double-sided tape or pre-applied adhesive to attach directly to your helmet. Once installed, they’re generally permanent unless you’re willing to use adhesive remover.
Benefits: Lower cost, simple installation, wide variety of designs, no moving parts
Drawbacks: Permanent placement, difficult to reposition, may leave residue when removed
Suction Cup Designs
Suction cup horns offer a middle ground between magnetic and adhesive systems. They attach via small suction cups, allowing for repositioning.
Benefits: Repositionable, no adhesive residue, lowest commitment level
Drawbacks: Require periodic reattachment, less stable at high speeds, temperature sensitive
Combination Systems
Some products, like the Lewtemi set, include both adhesive backing and suction cups, giving you options based on your preference and helmet surface.
How to Choose the Right Helmet Horns for Your Needs 🎯
Selecting the perfect motorcycle helmet with horns addition depends on several factors. Here’s my step-by-step approach:
Step 1: Determine your budget. Prices range from $8 to $25, with magnetic systems commanding premium prices.
Step 2: Consider your riding style. Highway riders need wind-tested options rated for 80+ mph.
Step 3: Decide on attachment preference. Magnetic for versatility, adhesive for permanence, suction for experimentation.
Step 4: Check helmet compatibility. Most work universally, but verify your helmet’s curvature matches the product’s base.
Step 5: Choose your aesthetic. Devil horns, cat ears, mohawks, or custom designs—pick what resonates with your personality.
Step 6: Read customer reviews for real-world performance data beyond manufacturer claims.
Step 7: Consider weather resistance. Look for UV-resistant materials if you ride in sunny climates frequently.
Installation Guide: Mounting Your Helmet Horns Correctly
Proper installation makes the difference between horns that stay put at 100 mph and ones that fly off on your first ride. Here’s the process for each type:
Installing Magnetic Systems
Start by cleaning the helmet surface thoroughly with isopropyl alcohol. Let it dry completely—moisture is the enemy of adhesive bonds. Position the magnetic nubs where you want your horns, marking with tape if needed. Remove the protective backing from the adhesive pad and press firmly for 30 seconds. Wait 24 hours before attaching the horns for the adhesive to fully cure. When you’re ready to ride, simply click the horns onto the magnetic nubs.
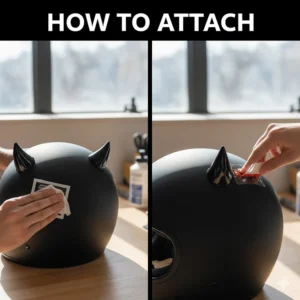
Installing Adhesive-Mount Horns
Clean the helmet surface with alcohol and dry completely. Test-fit the horns without removing the adhesive backing to ensure proper placement. Once satisfied, remove the backing and press firmly for 30 seconds. Apply even pressure across the entire adhesive surface. Wait at least 12 hours before riding to allow the bond to set. Some riders use a hair dryer on low heat to activate the adhesive for an extra-strong bond.
Installing Suction Cup Options
Clean the surface thoroughly—suction cups need pristine surfaces to work effectively. Slightly dampen the suction cup (some water helps create the initial seal). Press firmly and twist slightly to remove air bubbles. Check the suction before each ride, reattaching as needed. These work best on smooth, curved helmet surfaces rather than textured ones.
Material Quality: What Makes Horns Durable? 🔧
Not all plastic is created equal, and when you’re dealing with accessories that face wind, rain, and UV exposure, material matters.
ABS Plastic: This is the gold standard for helmet horns motorcycle products. ABS (Acrylonitrile Butadiene Styrene) offers excellent impact resistance, doesn’t crack easily in cold weather, and maintains color well. Products like Helmet Flair and Alician use ABS for good reason.
PC (Polycarbonate) Material: Found in products like SEADEAR horns, PC material provides superior strength and heat resistance. It’s more expensive than standard plastic but resists aging and yellowing better.
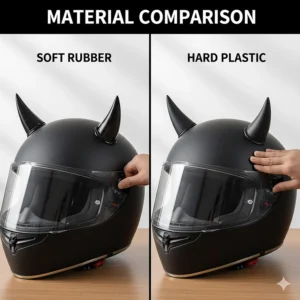
Silicone/Rubber: Softer options like Elarco’s rubber horns offer flexibility and a unique texture. They’re less likely to damage other vehicles or people in minor contact situations, though they may not maintain shape as well long-term.
Adhesive Quality: The attachment method matters as much as the horn material. Look for 3M adhesive backing or equivalent industrial-grade options. Cheap adhesive fails in heat, cold, or moisture.
According to materials science research, ABS plastic maintains structural integrity across temperature ranges from -20°C to 80°C, making it ideal for year-round riding.
Speed Testing and Wind Resistance Data
This is where marketing meets reality. Many products claim “high-speed capability,” but what does that actually mean?
Helmet Flair’s products are the most transparent, with customer testing reported up to 150 mph for small horns and 100 mph for large horns. These aren’t official laboratory tests, but real-world rider experiences. The magnetic attachment system’s design allows horns to pop off in severe impacts rather than transferring force to your helmet or neck—a safety feature that’s often overlooked.
Adhesive-mounted options typically perform well up to 70-80 mph when properly installed. Beyond that, wind force increases exponentially, and cheaper adhesives may fail. I’ve read reports of budget horns lasting fine at highway speeds, while others report losing them within minutes of hitting 75 mph.
The key factors affecting wind resistance include:
Surface area: Smaller horns naturally handle wind better than large ones
Attachment strength: Magnetic and quality adhesive outperform suction cups at speed
Aerodynamic design: Streamlined shapes reduce drag compared to flat surfaces
Installation quality: Even the best product fails if installed incorrectly
Helmet surface: Smooth, curved surfaces provide better adhesion than textured or vented areas
Maintenance Tips for Long-Lasting Helmet Horns
Want your helmet horns to last seasons instead of weeks? Follow these maintenance guidelines.
For Magnetic Systems: Remove the horns after each ride to prevent dust accumulation on the magnets. Clean the magnetic nubs monthly with a soft cloth. Inspect the adhesive pads holding the nubs periodically—if they show signs of lifting, add a small amount of super glue to reinforce.
For Adhesive Mounts: These require minimal maintenance once installed. Check for cracks or discoloration monthly. If you ride in dusty conditions, wash the horns with soap and water occasionally. Avoid using harsh chemicals or pressure washers directly on the horns.
For Suction Cup Designs: Clean the suction cups before each ride with water. Replace suction cups every few months as they lose elasticity over time. Store in a cool, dry place to prevent rubber degradation.
General Care: UV exposure fades colors over time. Consider removing decorations when parking in direct sunlight for extended periods. Winter riders should check attachments more frequently, as temperature cycling can affect adhesive strength.
Legal Considerations: Are Helmet Horns Legal?
Here’s the good news: helmet horns motorcycle accessories are generally legal in the United States. However, there are important caveats.
Helmet safety standards (DOT, SNELL, ECE) certify the helmet itself, not additions to it. Adding external accessories doesn’t void your helmet’s certification, but you’re responsible for ensuring they don’t compromise safety. This means:
Don’t drill into your helmet: Never compromise the shell integrity
Avoid vision obstruction: Horns shouldn’t block your peripheral vision
Check local laws: Some states have regulations about protruding objects on helmets
Consider removal points: Sharp horns could pose risks in certain scenarios
According to DOT helmet standards, external accessories are permissible as long as they don’t interfere with the helmet’s protective function. Magnetic and adhesive-mount systems that don’t penetrate the helmet shell are compliant.
Some track day organizations and racing leagues prohibit helmet decorations for safety reasons. Always check venue rules before adding accessories if you plan to ride on closed courses.
Style Guide: Matching Horns to Your Riding Aesthetic
Your helmet is an extension of your riding identity. Here’s how different horn styles complement various motorcycle cultures:
Cruiser Riders: Devil horns (especially large ones) fit the outlaw aesthetic perfectly. Black finishes work best with classic cruiser styling.
Sport Bike Enthusiasts: Smaller, aerodynamic options like Helmet Flair’s small horns maintain that performance look while adding personality.
Adventure Riders: Quirky options like cat ears or mohawks show you don’t take yourself too seriously on those long-distance tours.
Scooter and Urban Riders: Bright colors and playful designs match the fun, practical nature of city riding.
Vintage Motorcycle Owners: Consider classic horn designs or subtle additions that don’t clash with retro aesthetics.
The beauty of magnetic systems is the ability to match your horns to your mood or outfit. Monday devil horns, Tuesday cat ears, Wednesday… whatever the mood strikes.
Comparing Helmet Horns to Other Helmet Accessories
| Accessory Type | Cost | Installation | Visibility Benefit | Personalization |
|---|---|---|---|---|
| Helmet Horns | $8-$25 | Easy | Moderate | High |
| Helmet Mohawks | $10-$20 | Easy | High | Moderate |
| Reflective Stickers | $5-$15 | Easy | Moderate | Low |
| GoPro Mounts | $20-$50 | Moderate | None | Low |
| Bluetooth Systems | $50-$300 | Complex | None | None |
| Custom Paint | $200-$1000 | Professional | Moderate | Very High |
Helmet horns offer one of the best value propositions for personalization. They’re affordable, easy to install, and reversible (especially magnetic options). Compared to custom paint jobs that cost hundreds, a $20 set of magnetic horns provides similar visual impact with zero commitment.
Customer Reviews Analysis: What Riders Really Think 📊
After analyzing hundreds of reviews across multiple products, clear patterns emerge.
Positive Feedback Themes:
- “Gets compliments everywhere I ride”
- “Stayed on at 90+ mph”
- “Easy to install in under 5 minutes”
- “Makes my helmet unique”
- “Great conversation starter at gas stations”
Common Complaints:
- “Adhesive failed in hot weather”
- “Fell off during first ride”
- “Didn’t fit my helmet curve properly”
- “Color faded after a few months”
- “Magnets not strong enough”
The highest-rated products (Helmet Flair’s magnetic systems) consistently receive praise for quality and customer service. Mid-range options get mixed reviews, with success depending heavily on proper installation and realistic speed expectations. Budget options work well for casual riders but shouldn’t be trusted at sustained high speeds.
Interestingly, many negative reviews stem from installation errors rather than product defects. The most common mistake? Not waiting for adhesive to cure properly before riding.
Price Range and Value Analysis 💰
Understanding where your money goes helps make informed decisions.
Budget Tier ($8-$12): Products like Alician and basic SPRING PARK options. These work fine for casual riding under 60 mph. Materials are decent but not premium. Expect 6-12 months of use before needing replacement.
Mid-Range ($12-$18): SEADEAR, higher-end adhesive options, and multi-pair sets like Lewtemi. Better materials, more design choices, and generally longer lifespan (12-24 months). Good value for most riders.
Premium ($18-$25): Helmet Flair’s magnetic systems. USA manufacturing, superior materials, high-speed testing, and excellent customer service. These last years with proper care, and the interchangeable system means you’re buying into an ecosystem rather than single-use products.
True Cost Analysis: A $20 magnetic system that lasts 3+ years with interchangeable designs costs less per year than buying $10 adhesive horns that need replacement every season. Factor in the flexibility to change styles without buying new products each time.
Environmental Impact and Sustainability
Let’s talk about something nobody else mentions: the environmental footprint of decorative helmet accessories.
Most helmet horns are made from petroleum-based plastics that take centuries to decompose. However, their small size and long lifespan (when you choose quality options) minimize environmental impact compared to other fashion accessories.
Sustainable Choices:
- Buy quality once rather than replacing cheap products repeatedly
- Choose magnetic systems that allow horn swapping without discarding mounting hardware
- Properly dispose of old adhesive-mount horns (check local plastic recycling codes)
- Consider used/second-hand options from other riders upgrading their style
Helmet Flair’s replacement policy (they’ll send new horns if you lose one) reduces waste by not requiring whole-kit replacements. That’s an underappreciated environmental benefit wrapped in good customer service.
DIY Customization and Modification Ideas 🎨
Feeling creative? Here are ways to customize your helmet horns further:
Painting: Use model paint or spray paint designed for plastic. Light sanding (320-grit) improves paint adhesion. Apply several thin coats rather than one thick coat.
LED Integration: Small battery-powered LED strips can be attached inside hollow horns for night visibility. Secure with clear silicone adhesive.
Seasonal Decorations: Wrap horns in holiday-themed ribbon or attach small ornaments with removable adhesive.
Color Mixing: Buy multiple color sets and mix-and-match left and right horns for asymmetrical style.
Vinyl Wrapping: Automotive vinyl wrap offers endless color and texture options. Easier than painting and fully reversible.
Weatherproofing Enhancement: Clear automotive sealant adds UV protection and water resistance to any horn material.
Always test modifications on a spare horn first if possible. Remember that adding weight or changing aerodynamics may affect how well horns stay attached at high speeds.
Safety Considerations Beyond Basic Installation
Yes, helmet horns are primarily cosmetic, but safety still matters. Here’s what to consider:
Sharp Edges: Some designs have pointed tips that could pose risks in certain accident scenarios. File sharp points slightly rounded if concerned.
Peripheral Vision: Large horns positioned incorrectly can create blind spots. Test your field of view in a safe area before riding in traffic.
Weight Distribution: Heavy or unevenly mounted horns can create helmet instability. If your helmet feels off-balance, reposition or choose lighter options.
Emergency Removal: In accident situations, EMTs need to remove helmets quickly. Magnetic horns pop off easily, but adhesive-mounted ones shouldn’t interfere with standard helmet removal procedures.
Distraction Factor: Highly reflective or LED-enhanced horns might distract other drivers. Consider matte finishes for night riding.
The Motorcycle Safety Foundation recommends that any helmet modification should not compromise the helmet’s primary purpose: protecting your head. Horns that attach externally without penetrating the shell meet this criterion.
Troubleshooting Common Installation Problems 🔧
Even with straightforward products, issues arise. Here are solutions to the most common problems:
Problem: Horns fell off within hours of installation
Solution: You didn’t wait long enough for adhesive curing. Remove any residue, clean thoroughly with alcohol, and reinstall with 24-hour cure time
Problem: Magnetic horns won’t stay on at highway speeds
Solution: Ensure nubs are positioned on a smooth, curved surface rather than vented areas. Add a drop of super glue to reinforce the nub adhesive
Problem: Adhesive won’t stick to textured helmet
Solution: Sand the texture smooth with 220-grit sandpaper, creating a flat surface for better adhesion
Problem: Suction cups keep falling off
Solution: Clean both surfaces with alcohol, slightly dampen the cup, and consider using a tiny amount of petroleum jelly around the rim for improved seal
Problem: Horns look crooked after installation
Solution: For adhesive mounts, heat gently with a hair dryer to soften adhesive, reposition, and let cure again. For magnetic systems, simply remove and reattach
Problem: Color fading after a few weeks
Solution: UV exposure accelerates fading. Remove horns when parking in direct sun, or apply clear UV-protective spray coating
Seasonal Riding: Adjusting Your Horns for Weather
Different seasons present unique challenges for motorcycle helmet horns.
Summer Riding: Heat softens adhesives. Check mounts before long rides. UV exposure fades colors—consider darker shades or UV-resistant coatings. Dust accumulation on magnetic nubs requires more frequent cleaning.
Winter Riding: Cold makes plastics brittle. Magnetic systems perform better in freezing temperatures than adhesive mounts. Store horns at room temperature and attach just before riding.
Rain and Wet Conditions: Most horns handle rain fine, but suction cups lose effectiveness when wet. Magnetic systems excel in wet conditions.
Desert Riding: Extreme heat and intense UV require premium materials. Budget options may crack or fade rapidly. Clean frequently to prevent dust-embedded scratching.
Mountain/Altitude Riding: Temperature swings from base to summit can affect adhesive performance. Magnetic systems handle altitude changes best.
Year-round riders in variable climates get the most value from magnetic systems that can be easily removed during harsh weather and reattached when conditions improve.
Community and Culture: The Social Aspect of Helmet Horns
Helmet decorations have created an unexpected community among riders. Social media hashtags like #helmethorns and #helmetflair showcase thousands of creative installations. This has transformed what could be a purely cosmetic choice into a way of connecting with other riders.
Group rides often feature helmet decoration contests. Motorcycle rallies increasingly include “best decorated helmet” categories. Online forums dedicate entire threads to discussing and showcasing different horn combinations and custom modifications.
The psychology is interesting: riders report feeling more confident and outgoing when wearing decorated helmets. It’s like a conversation starter that you wear. Gas station stops become social opportunities. Other riders nod approvingly or ask where you got your horns.
Helmet Flair’s success stems partly from fostering this community. Their “show your flair” social media campaigns encourage riders to share photos, creating free marketing while building brand loyalty. It’s community-building disguised as customer engagement.
Frequently Asked Questions ❓
❓ Can motorcycle helmet horns damage my DOT-certified helmet?
❓ How fast can I ride with helmet horns attached?
❓ Are helmet horns motorcycle accessories legal for street riding?
❓ Can I switch horns between different helmets?
❓ How long do motorcycle helmet horns typically last?
Conclusion: Finding Your Perfect Helmet Horns Match 🏁
After diving deep into the world of motorcycle helmet horns, here’s my bottom line: these accessories offer an unbeatable combination of affordability, personality, and fun. Whether you’re dropping $10 on adhesive SEADEAR horns or investing $25 in a premium Helmet Flair magnetic system, you’re getting something that makes riding more enjoyable.
The sweet spot for most riders? Helmet Flair’s magnetic systems if you want versatility and longevity, or SEADEAR/Alician adhesive options if you’re on a budget and prefer simple installation. The Lewtemi 4-pair set offers exceptional value for riders who want variety without commitment.
Remember: proper installation matters more than which product you choose. Clean surfaces, adequate cure time, and realistic speed expectations turn mediocre reviews into success stories.
Your helmet is part of your identity on the road. These small additions transform safety equipment into personal statements. In a world where most riders look identical in black helmets and black jackets, standing out becomes an act of rebellion—the good kind.
So pick your style, install them properly, and prepare for the inevitable “Where’d you get those?” questions at every stop. Trust me, it never gets old.
🛒 Ready to Upgrade Your Helmet Style?
Don’t wait to add personality to your rides! Click on any of the highlighted products above to check current Amazon pricing and availability. Whether you choose magnetic versatility or adhesive simplicity, your perfect helmet horns are just a click away. Transform your helmet today! 🏍️✨
Recommended for You
- Motorcycle Helmet Accessories: 7 Best Picks for 2025
- Motorcycle Helmet Decals: 7 Best Picks That Transform Rides
- Motorcycle Helmet Visor: 7 Top Picks for 2025 Revealed
Disclaimer: This article contains affiliate links. If you purchase products through these links, we may earn a small commission at no additional cost to you.
✨ Found this helpful? Share it with your friends! 💬🤗