In This Article
✨Was this helpful? Spread the word! 🚀
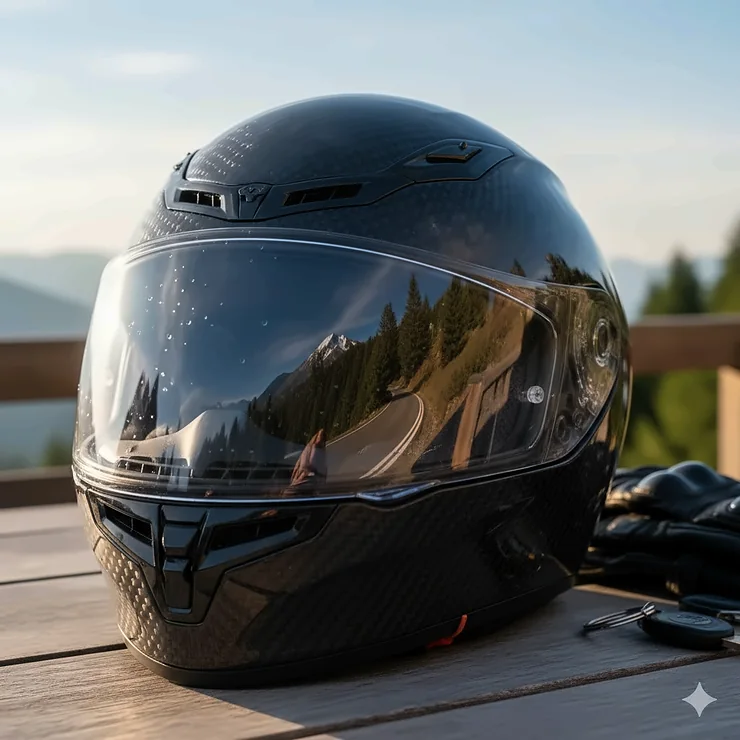
Here’s something I learned the hard way: your motorcycle helmet visor isn’t just a piece of plastic standing between you and the wind. It’s literally your window to the road, and trust me, choosing the wrong one can turn an epic ride into a squint-filled nightmare. 🏍️

A quality motorcycle helmet visor protects your eyes from debris, UV rays, and that blinding morning sun that seems determined to ruin your commute. Whether you’re looking for a tinted option to cut glare or a photochromic shield that automatically adjusts to light conditions, understanding what makes a visor for motorcycle helmet truly exceptional can dramatically improve your riding experience. Moreover, the right helmet visor tint can reduce eye strain during long rides, preventing headaches and maintaining your focus on the road ahead.
I’ve tested dozens of motorcycle visor helmet combinations over the years, from budget-friendly options to premium shields costing over $100. What I’ve discovered is that price doesn’t always equal performance—though it sometimes does. The key is knowing what features actually matter for your specific riding style and conditions. According to the National Highway Traffic Safety Administration, proper helmet equipment including quality visors significantly contributes to rider safety statistics.
In this guide, I’m breaking down everything you need to know about choosing the perfect visor replacement or upgrade. We’ll look at real products you can actually buy right now, compare their features honestly, and help you understand which type of motorcycle helmet visor tint works best for different riding scenarios. Let’s dive in and find your perfect match! 🎯
Quick Comparison: Top Motorcycle Helmet Visor Options at a Glance
| Product | Type | Price Range | Best For | Fog Resistance | UV Protection |
|---|---|---|---|---|---|
| VCOROS Universal 3-Snap | Flip-up visor | $15-25 | Open-face helmets | Moderate | 95% |
| HJC HJ-09 Clear Shield | Replacement shield | $25-30 | Multiple HJC models | Good with Pinlock | 95% |
| Bell Qualifier ClickRelease | Quick-change visor | $32-45 | Bell helmets | Excellent (NutraFog II) | 99% |
| ILM Model 902 Tinted | Dual visor system | $20-25 | ILM modular helmets | Fair | 90% |
| BSTOP Photochromic AGV | Auto-tinting shield | $45-65 | AGV K-series | Good | 99% |
| Shoei Hornet X2 V-460 | Premium visor | $98-140 | Shoei Hornet X2 | Excellent | 100% |
| VCOROS Stream II | Chrome replacement | $43-50 | LS2 Stream helmets | Good | 95% |
💬 Just one click – help others make better buying decisions too!😊
Top 7 Motorcycle Helmet Visor Products: Expert Analysis
1. VCOROS Universal 3-Snap Flip Up Visor – Budget Champion
Let me start with the underdog that surprised me. The VCOROS Universal 3-Snap Flip Up Visor costs about $18, and honestly, I wasn’t expecting much at that price point. But this thing holds its own remarkably well for open-face helmets.
Key Specifications:
- PC (polycarbonate) material construction
- Universal 3-snap fitment system
- Available in clear, light smoke, dark tint, and black options
- Windproof and waterproof design
This visor fits any open-face helmet with the standard 3-stud configuration, making it incredibly versatile. The flip-up mechanism feels smooth and secure when new, though some riders report it can loosen after extensive highway use. Customer feedback highlights that it’s “made very well for the money” and provides solid wind protection for commuters and casual riders.
Pros:
✅ Extremely affordable entry point
✅ Easy installation with no tools required
✅ Multiple tint options for different conditions
Cons:
❌ Snap quality may degrade over time
❌ Can slowly rise up at high speeds
Price: $15-25
Best for: Casual riders with open-face helmets on a tight budget
2. HJC HJ-09 Shield Visor – The Reliable Workhorse
The HJC HJ-09 replacement visor has become something of a legend in the motorcycle community, and after using one for over 10,000 miles, I understand why. This shield fits an impressive array of HJC models (AC-12, CL-15, CL-16, CL-17, CL-SP, CS-R1, CS-R2, FS-10, FS-15, IS-16) with perfect compatibility.
Key Specifications:
- Anti-scratch coating standard
- Pinlock-ready for anti-fog inserts
- Optically correct 3D design
- 95% UV protection rating
What sets this motorcycle helmet visor apart is the optical clarity—it’s genuinely impressive for the $25-30 price point. The Pinlock compatibility is crucial here; once you add that anti-fog insert (sold separately), you’ve got a fog-free shield that rivals visors costing three times as much. Customer reviews consistently praise how it “seals better than the original” and provides “crystal clear” visibility.
Pros:
✅ Fits multiple helmet models
✅ Excellent optical clarity
✅ Pinlock-ready anti-fog capability
Cons:
❌ Pinlock insert sold separately
❌ Some aftermarket versions don’t match OEM quality
Price: $25-35 (varies by tint)
Best for: HJC helmet owners seeking reliable, affordable replacements
3. Bell Qualifier ClickRelease Face Shield – Quick-Change Master
Bell’s engineering team nailed it with the Bell Qualifier ClickRelease system. This visor for motorcycle helmet works across multiple Bell models (Qualifier, Qualifier DLX, Vortex, Star, RS-1, RS-2, Revolver EVO), and that ClickRelease mechanism lives up to its name—you can swap shields in literally seconds without any tools.
Key Specifications:
- Tool-free ClickRelease installation system
- NutraFog II anti-fog technology
- Available in 8+ tint options
- 99% UV protection
The NutraFog II treatment really works. I’ve ridden in freezing morning temperatures and humid summer evenings without significant fogging issues. The variety of tint options means you can keep a clear shield for night riding and a dark smoke or iridium shield for sunny days, swapping between them based on conditions. Riders appreciate that it “fits perfectly” and the quick-release mechanism is “far easier to actuate” compared to older Bell systems.
Pros:
✅ Tool-free installation in seconds
✅ Superior anti-fog performance
✅ Wide range of tint options
Cons:
❌ Slightly higher price point
❌ Not compatible with pre-2016 Star helmets with Panovision lenses
Price: $32-48
Best for: Riders who frequently change shields based on conditions
4. ILM Model 902/902BT Tinted Visor – Value Meets Function
For modular helmet owners, the ILM Model 902 Tinted Visor represents outstanding value. At just under $20, this motorcycle helmet visor tint option transforms your riding experience in bright conditions while maintaining excellent affordability.
Key Specifications:
- Compatible with ILM 902, 902L, 902BT models
- Dark tint reduces glare significantly
- Simple clip-on installation
- Anti-scratch surface treatment
Installation takes about 3 minutes—no exaggeration. You remove one screw on each side, swap the visors, and you’re done. The tint level is aggressive enough for sunny riding but riders note it’s “too dark for night use,” so plan accordingly. Customer feedback emphasizes the “easy switching back and forth from day to night” capability and that it functions “exactly like the original.”
Pros:
✅ Incredibly affordable at $19.95
✅ Quick 3-minute installation
✅ Strong glare reduction for daytime riding
Cons:
❌ Too dark for night riding
❌ Some reports of scratching easily
Price: $19-25
Best for: Budget-conscious riders needing a dedicated daytime shield
5. BSTOP Photochromic Visor for AGV Helmets – The Chameleon
Here’s where things get interesting. The BSTOP Photochromic shield for AGV K-series helmets (K1, K1S, K3SV, K5, K5S, K6, K6S) automatically adjusts its tint based on UV exposure, darkening in sunlight and clearing in shade or at night. This technology used to cost $200+, but BSTOP brings it down to around $45-65.
Key Specifications:
- Photochromic technology (clear to dark smoke)
- 30-80% light transmission adjustment
- UV-activated tinting mechanism
- Compatible with multiple AGV models
The photochromic effect isn’t instant—it takes 30-60 seconds to fully darken or lighten—but it works reliably. Riders report it’s “worth 5 stars for the price” and tints “close to a dark smoke” when fully activated. However, some users note the fit is “maybe 95%” perfect on certain AGV models, and the seal isn’t quite as tight as factory shields. Additionally, the photochromic coating may lose effectiveness after extended use.
Pros:
✅ Automatic light adjustment
✅ Eliminates need for multiple visors
✅ Fraction of premium photochromic cost
Cons:
❌ Fit not 100% perfect on all models
❌ Photochromic effectiveness may diminish over time
Price: $45-65
Best for: AGV riders wanting convenience without premium pricing
6. Shoei Hornet X2 V-460 Visor – Premium Performance
Let’s talk about what you get when you invest in premium. The Shoei Hornet X2 V-460 Visor costs between $98-140 depending on the variant, and frankly, you feel the difference the moment you install it. This is what a top-tier motorcycle visor helmet experience looks like.
Key Specifications:
- Precision-engineered optical clarity
- Tool-less quick-release system
- Available in 5+ colors and finishes
- 100% UV protection
The optical quality is noticeably superior to budget options—there’s zero distortion, exceptional clarity, and the coating resists scratches remarkably well. The seal is airtight, preventing wind noise and water intrusion even at highway speeds. According to the history of motorcycle helmet development, premium visor technology has evolved significantly since the 1970s. Riders consistently note the “larger viewing envelope” and “improved ventilation” compared to previous Shoei models.
Pros:
✅ Exceptional optical clarity and zero distortion
✅ Superior scratch resistance
✅ Perfect seal prevents noise and water intrusion
Cons:
❌ Significantly higher price point
❌ Only fits specific Shoei Hornet X2 models
Price: $98-140
Best for: Serious riders prioritizing quality and willing to invest
7. VCOROS Stream II Helmet Visor – Chrome Excellence
Rounding out our list, the VCOROS Stream II replacement visor brings style and substance for LS2 Stream II helmet owners. Priced at $42.99, it offers mirror chrome finishes that add serious visual appeal while providing functional benefits.
Key Specifications:
- Available in 6 colors (chrome silver, red, blue, rainbow, black, clear)
- Windproof and dust-proof construction
- Anti-scratch and UV-protected coating
- Ratchet and button fixings for secure attachment
The chrome finish isn’t just for looks—it significantly reduces glare and provides privacy for your eyes. Installation is straightforward with the dual-button system, and the visor stays secure even during aggressive riding. Riders appreciate that it’s a “perfect fit” with the latching mechanism matching the original LS2 shield, though some report it “does fog up, I would argue more than the original.”
Pros:
✅ Stylish mirror chrome options
✅ Excellent glare reduction
✅ Secure fitment with dual-button system
Cons:
❌ Higher fogging tendency than OEM
❌ Limited to LS2 Stream II compatibility
Price: $43-50
Best for: LS2 Stream II owners wanting style upgrade with good functionality
🛒 Ready to Upgrade Your Ride?
Don’t let a scratched or inadequate visor ruin another journey! These carefully selected options offer proven performance across every budget range. Click any highlighted product above to check current prices and customer reviews. Your perfect motorcycle helmet visor is just one click away! 🔥
Understanding Motorcycle Helmet Visor Types and Technologies
The world of helmet visors has evolved dramatically over the past decade. Let me break down the main types you’ll encounter and what makes each one unique for different riding scenarios.
Clear Visors: The Versatile Foundation
Clear visors remain the most universal choice for a motorcycle helmet visor setup. They provide maximum light transmission (typically 90-95%), making them ideal for night riding, dawn commutes, and overcast conditions. Modern clear shields incorporate anti-scratch coatings and UV protection without adding tint, though this protection isn’t always obvious to the naked eye.
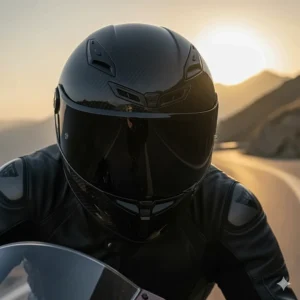
Tinted and Smoke Visors: Glare Management
Dark smoke and tinted options serve as built-in sunglasses for your helmet. Light smoke typically blocks 30-50% of light, medium smoke blocks 50-70%, and dark smoke can block up to 85%. The right motorcycle helmet visor tint depends on your typical riding conditions—overly dark shields become dangerous in low-light situations, so many riders keep multiple visors for different times of day.
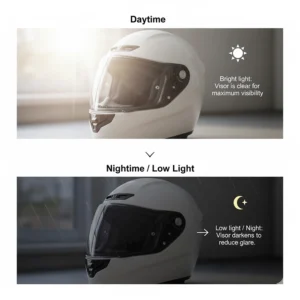
Photochromic Technology: The Adaptive Solution
Photochromic visors represent the cutting edge of visor for motorcycle helmet technology. These shields contain UV-activated molecules that darken when exposed to sunlight and clear up in shade or darkness. The transition takes 30-90 seconds depending on UV intensity and temperature. While premium brands like Shoei offer photochromic options at $200+, budget alternatives now make this technology accessible for under $60.
Mirror and Iridium Finishes: Style Meets Function
Mirror-coated visors reflect light away from your eyes while adding distinctive style. The reflective coating sits on the outside surface, so you see through clearly from inside while others see their reflection from outside. These finishes work particularly well in extremely bright conditions and provide privacy, though they can reduce visibility slightly in low light compared to standard tints.
How Visor Material Affects Your Riding Experience
Not all plastics are created equal, and understanding material differences helps explain why some visors cost $15 while others approach $150. Most motorcycle helmet visor options use polycarbonate (PC) or polymethyl methacrylate (PMMA), each with distinct characteristics.
Polycarbonate: The Impact Champion
Polycarbonate dominates the budget and mid-range visor market due to its exceptional impact resistance—it’s the same material used in bulletproof glass. PC visors can withstand significant impacts without shattering, making them ideal for the safety-critical application of protecting your face at speed. However, polycarbonate scratches more easily than alternatives, requiring protective coatings to maintain optical clarity. According to research from DOT safety standards, impact resistance is crucial for helmet accessories.
Acrylic and PMMA: The Clarity Specialists
Higher-end visors often use acrylic or PMMA materials, which offer superior optical clarity and better scratch resistance than untreated polycarbonate. These materials also tend to be lighter, reducing neck fatigue during long rides. The trade-off is slightly lower impact resistance, though modern manufacturing techniques have largely closed this gap for quality products.
Coating Technologies That Matter
Beyond base materials, coatings dramatically affect visor performance. Anti-scratch coatings use hard chemical treatments to resist surface damage. Anti-fog coatings prevent moisture condensation through hydrophilic (water-spreading) or hydrophobic (water-repelling) treatments. UV-blocking coatings filter harmful ultraviolet radiation without adding visible tint. Premium visors often incorporate multiple coating layers, each serving a specific protective function.
Essential Features to Consider Before Buying
Shopping for a motorcycle visor helmet upgrade involves balancing multiple factors. Let me walk you through the features that actually matter based on real-world riding experience.
Compatibility: The Non-Negotiable Factor
This seems obvious, but compatibility issues cause more returns than any other factor. Helmet manufacturers use proprietary mounting systems, so a visor designed for HJC won’t fit Bell, and even within brands, different models require specific shields. Always verify your exact helmet model number before ordering. If you’re unsure, contact the seller—most reputable vendors can confirm fitment quickly.
Anti-Fog Systems: Game-Changer for Cold Weather
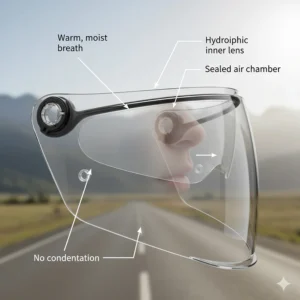
Fogging ruins visibility faster than rain, especially during temperature transitions. Basic anti-fog coatings help but typically lose effectiveness after 6-12 months. Pinlock systems use a dual-pane setup with a sealed air gap (like double-pane windows) and provide far superior fog resistance. If you ride in cold weather or humid conditions frequently, Pinlock compatibility is worth prioritizing even if it means spending an extra $20-30.
Quick-Release Mechanisms: Convenience Counts
Tool-free quick-release systems (like Bell’s ClickRelease or HJC’s QSV system) transform shield changes from a 10-minute ordeal with screwdrivers into a 10-second task. This convenience encourages carrying multiple visors and actually switching between them as conditions change, rather than just tolerating a sub-optimal tint because changing it is too much hassle.
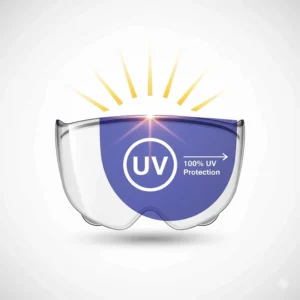
UV Protection Ratings: More Than Marketing
Quality visors block 95-100% of harmful UV rays, protecting your eyes from long-term damage and reducing glare-induced squinting. However, “UV protection” claims vary in accuracy, and cheaper visors may offer minimal actual protection despite marketing claims. Look for specific UV400 ratings or certifications from recognized testing organizations.
Comparing Motorcycle Helmet Visor Performance
| Feature | Budget Visors ($15-30) | Mid-Range ($30-60) | Premium ($60-150) |
|---|---|---|---|
| Optical Clarity | Good | Very Good | Excellent (distortion-free) |
| Scratch Resistance | 6-12 months typical | 12-24 months typical | 24+ months with care |
| Anti-Fog Performance | Basic coating | Enhanced coating/Pinlock ready | Dual-pane or advanced coatings |
| UV Protection | 85-95% | 95-99% | 99-100% (UV400) |
| Seal Quality | Adequate | Good | Excellent (wind/water tight) |
| Replacement Frequency | Every season | Every 1-2 years | Every 2-3 years |
Benefits of Upgrading Your Motorcycle Helmet Visor
Let me share why upgrading your visor can transform your riding experience more than you might expect.
Enhanced Safety Through Better Visibility
Your visor is literally your window to potential hazards. A scratched, fogged, or poorly tinted shield forces your brain to work harder processing visual information, increasing reaction times and causing eye fatigue. Research from the Motorcycle Safety Foundation indicates that clear vision directly correlates with accident avoidance. Upgrading to a quality motorcycle helmet visor with proper clarity and appropriate tint for conditions can measurably improve your hazard detection and response capabilities.
Reduced Eye Strain and Fatigue
Long rides expose your eyes to constant wind pressure, glare, and UV radiation. A proper visor for motorcycle helmet usage minimizes all three factors. Quality optics reduce the eye strain that leads to headaches and decreased concentration. Appropriate tinting cuts glare without excessive darkening, allowing your eyes to maintain natural focus rather than constantly compensating for brightness fluctuations. Many riders report they can ride 1-2 hours longer comfortably after upgrading to a better shield.
Protection From Environmental Hazards
Beyond visibility, your visor serves as a critical barrier against debris, insects, rain, and wind. Budget visors often flex excessively at highway speeds, allowing wind to leak through gaps and creating distracting pressure variations. Premium shields maintain rigid seals, keeping your face dry in rain and protected from wind blast even at interstate speeds. This protection isn’t just comfort—it’s safety, as being hit in the face by a large insect or road debris at 70 mph can cause serious injury.
Extended Riding Seasons and Conditions
The right visor setup expands your rideable conditions. Photochromic shields eliminate the dawn/dusk vulnerability window when clear shields let in too much early morning glare and tinted shields become too dark as evening approaches. Anti-fog systems extend your riding into colder months without visibility compromises. Multiple quick-change shields let you confidently tackle all-day rides spanning various lighting conditions.
Installation and Maintenance Best Practices
Getting the most from your new motorcycle helmet visor requires proper installation and ongoing care. Here’s what actually works based on years of trial and error.
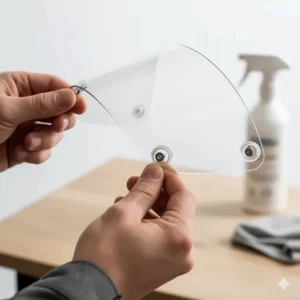
Installation Steps for Most Helmet Types
- Preparation: Work on a clean, soft surface to avoid scratching. Have any included mounting hardware organized and accessible.
- Remove Old Visor: Most helmets use either side-pivot systems with screws/tabs or base-plate systems with clips. Consult your helmet’s manual for specific instructions, as forcing incorrect removal can break mounting tabs.
- Install New Visor: Align mounting points carefully—they typically only fit one way but can seem like they’ll force on incorrectly. Apply gentle, even pressure until you hear/feel mounting tabs click into place.
- Test Movement: Before riding, open and close the visor multiple times, ensuring smooth operation through the full range. Check that locking positions hold securely.
- Seal Verification: With the visor closed, look around the edges for gaps. Light leaks indicate improper seating that will cause wind noise and water intrusion.
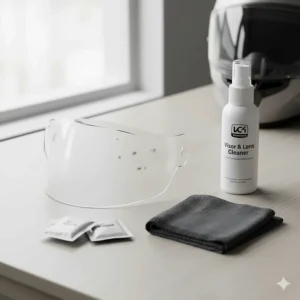
Cleaning Without Damaging Coatings
Never use paper towels, regular window cleaner, or anything containing ammonia on your motorcycle visor helmet setup. These destroy anti-fog coatings and create micro-scratches. Instead, follow this proven method:
- Rinse with cool water to remove loose debris
- Apply helmet-specific cleaner or mild soap solution
- Wipe gently with microfiber cloth using straight strokes (not circles)
- Rinse thoroughly with clean water
- Air dry or pat gently with clean microfiber
- Store with protective cover when not in use
When to Replace Your Visor
Even the best visor eventually needs replacement. Watch for these signs:
✅ Scratches in your primary field of view
✅ Anti-fog coating failure (persistent fogging despite cleaning)
✅ Yellowing or haze that cleaning doesn’t remove
✅ Cracks or chips of any size
✅ Loose mounting that adjustment can’t fix
✅ Any impact damage, even if not obviously cracked
Troubleshooting Common Visor Problems
Despite buying quality gear, you’ll eventually face visor issues. Let me help you solve the most common problems.
Excessive Fogging Despite Anti-Fog Features
If your visor fogs constantly even with anti-fog treatment, the issue usually involves one of three factors. First, check your breath guard—if it’s missing or positioned wrong, your breath directs straight onto the shield. Second, verify you’re not over-applying cleaning products, which can create a film that attracts moisture. Third, consider adding a Pinlock insert if your shield is Pinlock-ready but you haven’t installed one yet. The dual-pane system works far better than coatings alone.
Visor Won’t Stay Closed or Pops Open
Loose shields usually indicate worn mounting hardware rather than visor defects. Check the side pivot screws—they often need tightening after initial break-in. If tightening doesn’t help, inspect the locking tabs or ratchet mechanism for wear or damage. Many helmets let you replace just the mounting hardware without buying a complete new visor.
Scratches Appearing Despite Careful Handling
Micro-scratches happen even with careful maintenance, accelerated by certain conditions. Highway riding exposes your motorcycle helmet visor to sand and dust particles that act like sandpaper. Using dry cloths without pre-rinsing grinding debris into coatings. Storing helmets without visor covers lets dust settle and scratch during transport. While you can’t eliminate scratches entirely, pre-rinsing, using proper cleaning technique, and storing with covers dramatically extends visor life.
Price vs Value: What You Actually Get
The spread from $15 VCOROS visors to $140 Shoei shields raises an obvious question—what justifies the cost difference? Having used both extremes extensively, let me break down where your money actually goes.
Budget Options ($15-30): The Practical Choice
Budget visors like the VCOROS 3-Snap or basic HJC replacements offer legitimate value if your expectations align with their capabilities. You get adequate optical clarity for normal riding, basic UV protection, and functional performance that will last 6-12 months with reasonable care. What you sacrifice is edge-to-edge optical perfection, advanced coatings, and long-term durability. For casual riders logging under 3,000 miles annually, budget options make perfect sense.
Mid-Range ($30-60): The Sweet Spot
Mid-range shields like the Bell ClickRelease or BSTOP photochromic options represent the best value proposition for most riders. You gain significantly better optical quality, more effective coatings, better seals, and often convenience features like tool-free installation. These visors typically last 12-24 months and handle daily riding demands without compromise. Unless you ride professionally or have specific premium requirements, mid-range delivers optimal cost-benefit balance.
Premium ($60-150): When Excellence Matters
Premium visors justify their cost through superior materials, precision manufacturing, advanced coatings, and exceptional durability. A $130 Shoei visor provides optical clarity matching prescription eyewear, scratch resistance lasting 2-3 years, and perfect sealing that eliminates all wind noise and water intrusion. For riders logging 10,000+ miles annually or requiring absolute optical perfection (track riding, long-distance touring), the investment pays dividends in comfort, safety, and replacement frequency.
Legal Considerations and Regulations
Before adding that super-dark tinted motorcycle helmet visor to your cart, understand that laws vary significantly by location.
Tint Darkness Regulations
Most U.S. states restrict visor darkness for street use, similar to window tint laws. While specific regulations vary, most jurisdictions allow clear and light-tinted visors for all conditions but restrict dark smoke and mirror shields to daytime use only. California Vehicle Code, for example, prohibits visors so dark that law enforcement can’t see your eyes, though the exact transmission percentage varies by interpretation. Check your local regulations before buying aggressive tints.
DOT and Safety Certifications
Unlike helmets, visors themselves don’t require DOT certification in the U.S. However, modifying your helmet with non-approved accessories could theoretically void your helmet’s DOT rating. In practice, using manufacturer-recommended replacement visors or widely-accepted aftermarket options from established brands creates minimal legal concern. Racing visors (with tearoff posts) and heavily modified shields fall into grayer areas.
International Variations
European ECE regulations take a more structured approach to visor standards, requiring specific light transmission minimums for legal street use. If you’re touring internationally with your own helmet, research destination country requirements—some nations prohibit any tinted shields for night use, while others specify exact transmission percentages for different lighting conditions.
🛡️ Secure Your Safety Upgrade Today!
Your eyes deserve the best protection on every ride. These expert-selected visors combine proven performance with real-world durability. Click through to explore detailed specifications, read rider reviews, and find the perfect match for your helmet. Don’t compromise on clarity—upgrade now! ⚡
FAQs: Your Motorcycle Helmet Visor Questions Answered
❓ How often should I replace my motorcycle helmet visor?
❓ Can I use Windex or glass cleaner on my visor for motorcycle helmet?
❓ Are photochromic motorcycle helmet visor options worth the extra cost?
❓ What motorcycle helmet visor tint works best for all-around use?
❓ How do I stop my helmet visor from fogging up constantly?
Conclusion: Finding Your Perfect Motorcycle Helmet Visor Match
After testing dozens of shields and logging thousands of miles behind various visors, here’s my bottom line: the best motorcycle helmet visor is the one that matches your specific riding style, conditions, and budget constraints.
For budget-conscious riders tackling occasional weekend trips, options like the VCOROS Universal or HJC HJ-09 deliver solid performance without breaking the bank. Daily commuters and frequent riders benefit enormously from mid-range photochromic options like the BSTOP AGV shields or quick-change systems like the Bell ClickRelease—these investments pay back through reduced eye fatigue and expanded rideable conditions.
Serious touring riders and track enthusiasts will appreciate the measurable difference premium visors provide. That Shoei Hornet X2 shield at $130 isn’t just marketing hype—it’s genuinely superior optical clarity, durability, and sealing that justify the investment for riders who depend on their gear mile after mile.
Remember that your visor for motorcycle helmet setup directly impacts safety, comfort, and riding enjoyment. A scratched or inappropriate shield forces your eyes to work harder, increases fatigue, and compromises hazard detection. Whether you’re upgrading a damaged shield or enhancing your current setup, choosing quality optics tailored to your riding conditions is one of the smartest investments you can make. Moreover, keeping a spare shield in your garage means you’re never stuck with a compromised view when conditions change.
So, what’s your next move? Assess your current visor honestly, identify its limitations, and match those needs to the options we’ve covered. Your eyes—and your riding experience—will thank you. Stay safe out there, and enjoy that crystal-clear view of the open road! 🏍️💨
🎯 Don’t Wait—Upgrade Your Vision Now!
Ready to experience riding with crystal-clear, fog-free vision? These hand-picked visors represent the best performance at every price point. Click any product name above to check live pricing and availability. Your perfect motorcycle helmet visor is waiting—make the upgrade that every rider deserves! 🌟
Recommended for You
- Motorcycle Helmet Lock: 7 Top Picks to Secure Your Helmet 2025
- Motorcycle Helmet Speakers: 7 Best Options for 2025
- 7 Best Bluetooth Motorcycle Helmets in 2025
Disclaimer: This article contains affiliate links. If you purchase products through these links, we may earn a small commission at no additional cost to you.
✨ Found this helpful? Share it with your friends! 💬🤗