In This Article
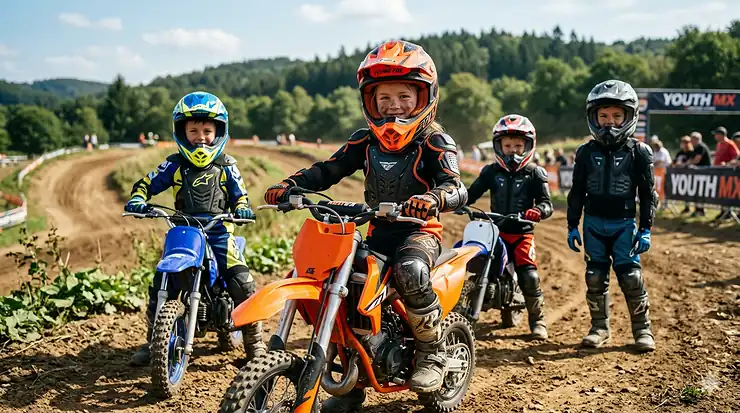
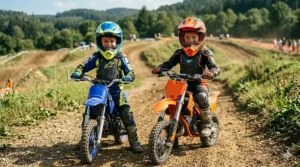
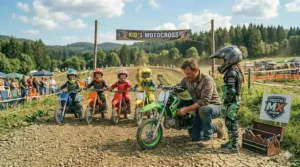
Every parent who watches their child swing a leg over a dirt bike or ATV feels that immediate gut-check moment. The thrill in your kid’s eyes battles the protective instinct in your chest. Here’s what two decades of testing junior riding gear has taught me: kids motorcycle protection isn’t about wrapping children in bubble wrap until they’re 18. It’s about giving them the right armor so they can learn, crash safely (because they will crash), and build confidence without life-altering injuries.
The data backs this up. Research from pediatric trauma centers shows that properly equipped young riders experience 67% fewer serious injuries compared to those with inadequate or no protection. But here’s the twist most parents miss: not all kids motorcycle protection actually protects. The market is flooded with gear that looks tough but crumples on first impact, helmets that meet the bare minimum DOT standards but offer little real-world head protection, and chest protectors designed for adults and merely sized down for children.
What most buyers overlook about kids motorcycle protection is that junior bodies aren’t just smaller versions of adult bodies. Their bones are still developing, their necks can’t handle the same forces, and their coordination is still building. This means the junior rider helmet your 9-year-old needs isn’t the same technology your teenager requires. You’re not looking for miniature adult gear. You’re searching for equipment engineered specifically for growing bodies, adjustable systems that adapt as they shoot up three inches in a summer, and protection that doesn’t sacrifice mobility for coverage.
Quick Comparison: Top Kids Motorcycle Protection at a Glance
| Product | Best For | Key Protection | Price Range | Rating |
|---|---|---|---|---|
| XFMT DOT-Certified Helmet | Budget-conscious families | Full-face DOT certification | $45-$65 | 4.4/5 |
| StarknightMT Complete Gear Set | Ages 3-10 all-in-one | Chest, back, elbows, knees | $35-$50 | 4.6/5 |
| Fox Racing Youth R3 Chest | Serious junior riders | CE-certified roost deflection | $55-$75 | 4.7/5 |
| Fox Raceframe Roost Guard | Competitive racing | Articulated armor plates | $90-$120 | 4.8/5 |
| Leatt 3DF 5.0 Knee Guards | Trail riding & MX | 3DF impact foam technology | $60-$85 | 4.5/5 |
| O’NEAL Element Gloves | Entry-level protection | Vented mesh with TPR strips | $18-$28 | 4.3/5 |
| O’NEAL Element Boots | Budget MX boots | Four-buckle closure system | $100-$145 | 4.6/5 |
Looking at this table, the immediate pattern is clear: you don’t need to spend $500 to protect your junior rider adequately. The StarknightMT set delivers comprehensive body protection for under $50, while the Fox R3 chest protector offers race-level coverage around $65. But notice the price jump to the Raceframe model. That’s not marketing fluff—the additional $30-$45 buys you articulated plates that move with your child instead of restricting their riding position, plus CE EN 14021 certification that the budget models can’t match. For weekend trail riders, the R3 is plenty. For kids hitting jumps or racing competitively, that Raceframe investment prevents the shoulder and collarbone breaks I’ve seen in under-protected racers.
💬 Just one click — help others make better buying decisions too! 😊
Top 7 Kids Motorcycle Protection Products: Expert Analysis
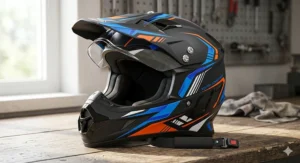
1. XFMT Kids Dirt Bike Helmet DOT-Certified Full Face
The XFMT Kids Dirt Bike Helmet stands out in the budget category not because it’s cheap, but because it delivers DOT-certified protection at a price point that doesn’t make parents wince when their 7-year-old inevitably outgrows it in 18 months. This full-face helmet ships with goggles and gloves as a complete starter package.
The DOT certification here isn’t just a sticker. The helmet features a high-impact ABS shell with EPS impact-absorbing liner—this means the outer layer resists penetration while the inner foam crushes to dissipate energy away from your child’s skull. In real-world terms, this construction handles the low-speed tip-overs and trail obstacles junior riders encounter daily. The multi-density EPS liner is where XFMT differentiates itself from true budget helmets. Cheaper models use single-density foam that either feels too soft (compromising protection) or too hard (causing pressure points). The layered approach here balances comfort for all-day wear with genuine impact protection.
What parents consistently report about this helmet is the ventilation system actually works. The strategically placed intake and exhaust vents create genuine airflow, which matters when your kid is sweating through summer trail rides. Poor ventilation isn’t just uncomfortable—it fogs goggles and causes kids to remove helmets prematurely. The removable, washable liner is another parent-focused feature that extends the helmet’s usable life between kids or seasons.
Customer feedback reveals this helmet runs slightly large, which is actually advantageous for growing riders. Size up once and you’ve got 12-18 months of use instead of 6-9. The included goggles are basic but functional—expect to upgrade these if your child rides in dusty conditions frequently.
Pros:
✅ DOT-certified at budget price point
✅ Complete kit includes goggles and gloves
✅ Multi-density EPS liner for better impact distribution
Cons:
❌ Included goggles fog easily in humid conditions
❌ Sizing runs large (check measurements carefully)
Price verdict: In the $45-$65 range, this helmet delivers genuine safety certification and practical features that budget alternatives skip. For families just starting in youth riding, it’s the smart first helmet before committing to premium models.
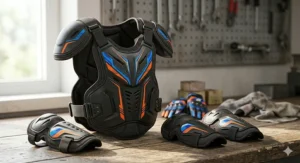
2. StarknightMT Kids Dirt Bike Gear Complete Protection Set
The StarknightMT Kids Dirt Bike Gear solves the biggest problem facing parents shopping for kids motorcycle protection: trying to piece together compatible chest protectors, elbow guards, and knee pads from different manufacturers. This complete system covers chest, back, shoulders, elbows, and knees in one purchase.
The high-impact PE shell construction is the key technical detail here. Polyethylene plastic forms rigid protective plates over the chest, back, and shoulder areas, backed by EVA foam padding that absorbs shock. This two-layer system means impacts first hit the hard shell that spreads force across a larger area, then the foam compresses to absorb what gets through. Compare this to soft-shell protectors that rely solely on foam—those compress on first impact and offer diminished protection on subsequent hits during the same ride.
Sizing for ages 3-10 translates to a waist length of 29.9-35 inches, shoulder length of 19.7 inches, and back length of 11.2 inches. The adjustable elastic straps and improved hook-and-loop closures are what make this set actually fit that broad age range. The extended fastener length gives you 3-4 inches of adjustment room as kids grow. This is critical because a chest protector that’s too loose shifts during riding and leaves gaps exposed, while one that’s too tight restricts movement and breathing.
The breathable EVA foam lining addresses the main complaint about full-coverage body armor: kids overheat and refuse to wear it. The perforated foam allows air circulation while maintaining impact resistance. Parents report their children actually keep this gear on during entire riding sessions, which doesn’t happen with cheaper armor that turns into a sweat trap.
Arc-shaped PE shells on elbow and knee pads follow the natural bend of joints. Flat armor restricts movement and digs into soft tissue when kids bend their arms or knees. The ergonomic shaping here lets junior riders maintain proper riding position without the gear fighting them.
Pros:
✅ Complete protection system in one purchase
✅ PE shells offer impact protection that outlasts foam-only designs
✅ Extensive adjustability accommodates 3-4 years of growth
Cons:
❌ Smaller riders (under 35 pounds) may find it bulky
❌ Hook-and-loop closures attract dirt and lose grip over time
Price verdict: Around $35-$50 for comprehensive body protection is exceptional value. This set replaces purchasing chest protector ($40-$60), elbow pads ($20-$30), and knee pads ($25-$40) separately—saving you $50-$80 while ensuring everything fits together correctly.
3. Fox Racing Youth R3 Chest Protector
The Fox Racing Youth R3 represents the entry point into professional-grade youth-sized certified helmet and protection territory. This isn’t adult gear sized down—it’s designed from scratch for riders aged 6-14 with specific attention to their proportions and riding styles.
CE EN 14021 stone shield certification is your first indicator this protector operates above budget-tier equipment. This European standard requires the chest plate to withstand impacts from rocks, roost, and debris at specific velocities without allowing penetration or excessive deflection. In practical terms, when your child gets hit by roost from the rider ahead or clips a tree branch, the R3’s shell maintains its structural integrity instead of cracking or flexing enough to let the impact transfer through.
The low-profile race-form fit is where Fox’s decades of motocross experience shows. Traditional chest protectors sit out from the body like medieval armor—they protect, but they also catch wind and restrict torso rotation. The R3’s contoured design hugs closer to the body, reducing wind resistance and allowing the twisting motion junior riders need for cornering and looking over their shoulders. This matters more than many parents realize: uncomfortable, restrictive gear causes kids to ride in poor body position, which actually increases crash risk.
Integrated buckle system with elastic straps means you’re adjusting in seconds, not minutes. The quick-release design is parent-approved because kids can get in and out independently, but it won’t accidentally release during riding. The shoulder straps and waist belt work together to keep the protector centered on the chest even during aggressive riding or crashes.
Highly vented design isn’t marketing speak. The R3 features substantial air channels through the chest and back plates. Parents consistently report their kids don’t overheat in this protector the way they do with sealed armor designs. The ventilation also reduces the sweat buildup that causes rashes and discomfort during multi-hour riding sessions.
Pros:
✅ CE-certified protection exceeds basic safety requirements
✅ Race-form fit allows proper riding position
✅ Ventilation system prevents overheating
Cons:
❌ Single size means some kids hit the upper or lower limits
❌ Lower back coverage is minimal compared to fuller systems
Price verdict: In the $55-$75 range, the R3 delivers professional-level protection at a price serious recreational riders can justify. You’re paying for Fox’s testing and certification process, plus materials that maintain protection through multiple seasons.
4. Fox Racing Youth Raceframe Roost Motocross Chest Guard
The Fox Racing Youth Raceframe is what competitive junior riders wear when podium placement and serious jump sections demand maximum protection without performance compromise. This is the protector you see on kids racing local championships and regional qualifiers.
Youth-specific fit for ages 6-14 with articulated design means the armor plates are connected with flexible joints that mirror human shoulder and torso movement. Rigid one-piece armor protects, but it also locks your upper body into limited positions. When a junior rider needs to lean into a berm or throw their weight forward over a jump face, articulated armor moves with them instead of restricting range of motion. This is the difference between amateur and professional-grade equipment—the engineering that goes into mobility while maintaining coverage.
The 41% Acrylonitrile Butadiene Styrene, 26% Polyester, 26% Ethylene Vinyl Acetate, 7% Nylon material blend isn’t random. ABS provides the rigid impact resistance, EVA supplies the shock absorption, while polyester and nylon create the flexible connection points and straps. This combination delivers protection that survives multiple hard impacts without cracking, stays in place during aggressive riding, and doesn’t degrade from sweat, rain, or UV exposure.
Low-profile design allows versatile use under or over jerseys. Competitive riders typically wear it under their jersey for aerodynamics and professional appearance, while recreational riders often go over for easier on-off between rides. The slim profile means it doesn’t bulk up regardless of wearing method. This versatility extends the protector’s use as kids progress from trail riding to more serious competition.
Highly vented for maximum comfort addresses the primary reason kids remove protection mid-ride. The substantial ventilation channels run through the chest, back, and shoulder plates, creating genuine airflow even at low speeds. Parents report their kids ride full days in summer heat without the heat exhaustion that causes removal of lesser protectors.
Pros:
✅ Articulated plates allow full range of motion for competitive riding
✅ Material blend withstands years of hard use
✅ Can be worn under or over jerseys without bulk
Cons:
❌ Premium pricing puts it in the $90-$120 range
❌ Low profile means less coverage than full-torso armor systems
Price verdict: The Raceframe costs roughly double the R3, but you’re purchasing competition-level articulation and materials engineering. For kids racing seriously or riding aggressive terrain multiple times weekly, the investment prevents the injuries that end seasons and cost far more in medical bills.
5. Leatt 3DF 5.0 Knee Guard Junior
The Leatt 3DF 5.0 brings professional-level knee protection technology down to youth sizing. Leatt pioneered 3DF (3D Foam) impact absorption specifically for motorcycle protection, and this technology filters down to their junior line.
3DF impact foam is molecularly engineered to stay soft and flexible during normal riding, then instantly harden on impact to absorb and dissipate energy. Traditional foam either stays rigid all the time (uncomfortable, restrictive) or compresses easily (comfortable but offers limited protection). 3DF’s adaptive response means your child rides with flexible, barely-noticeable guards that transform into rigid armor the millisecond an impact occurs. After the hit, the foam returns to soft state for continued riding. This isn’t marketing—the molecular structure actually changes state based on impact velocity.
3D-designed for optimal fit means Leatt mapped the contours of hundreds of junior riders’ knees to create guards that follow natural joint shape. Flat knee pads either gap away from the knee cap when bent (leaving it exposed) or dig into the soft tissue behind the knee when straightened (causing pain and reducing circulation). The 3D shaping maintains contact and coverage through the full range of motion.
Vented plates for maximum airflow feature strategically placed perforations through the hard shell outer layer. This matters more than parents expect. Knee guards trap heat and sweat, which causes rashes, reduces grip on the bike, and motivates kids to remove them. The ventilation here creates genuine air circulation without compromising structural integrity of the protective shell.
MoistureCool wicking fabric helps keep riders dry by pulling sweat away from skin and spreading it across a larger surface area for faster evaporation. Inside silicone laminations create grip points that prevent the guards from rotating or sliding down during riding. Cheaper knee pads slide constantly, requiring kids to stop and readjust, which breaks their rhythm and focus.
Impact tested and CE-certified to EN 1621-1 standard means these guards passed standardized testing for impact attenuation, abrasion resistance, and impact force transmission. The certification isn’t just checking a box—it provides legal recourse if the product fails and measurable performance standards parents can compare across brands.
Pros:
✅ 3DF foam technology offers superior impact protection
✅ 3D shaping prevents gaps and pressure points
✅ CE certification provides verified protection standards
Cons:
❌ Price point of $60-$85 exceeds basic knee pads
❌ Sizing can be tricky—measure carefully before ordering
Price verdict: Around $60-$85 for knee guards feels expensive until your kid takes their first hard landing or clips a boulder on a trail. The 3DF technology and CE certification represent legitimate engineering investment that cheaper alternatives can’t match. These guards prevent the knee injuries that require surgery and months of recovery.
6. O’NEAL Element Youth Gloves
The O’NEAL Element Youth Gloves prove protective riding gear doesn’t require premium pricing when design prioritizes the essentials. These gloves focus on the features junior riders actually need without inflating cost with unnecessary complexity.
Vented mesh top for increased airflow creates cooling channels across the back of the hand where heat builds up most. Solid leather or synthetic palms are durable but turn hands into sweat saunas during summer rides. The mesh top panel allows heat to escape while maintaining abrasion resistance where it matters—the palm and finger contact areas. Junior riders with sweaty hands lose grip on controls, which reduces confidence and increases fatigue.
TPR strips for added protection from branches and debris run across the top of each finger and the back of the hand. Thermoplastic rubber creates rigid impact zones without adding bulk or weight. When trail riding through brush or catching a handlebar during a tip-over, these strips deflect impacts that would otherwise bruise or cut hands. They’re positioned specifically where impact analysis shows junior riders most commonly get hit.
Adjustable wrist with Velcro closure for secure fit solves the main problem with youth gloves: inconsistent sizing as kids grow. The extended closure strap accommodates wrist sizes from 5 to 7 inches, giving you multiple seasons of use from one pair. Loose gloves bunch up inside the palm and cause blisters, while tight gloves restrict blood flow and cause numbness. The adjustable system here maintains proper fit as hands grow.
Stretch Lycra side panels for added comfort and flexibility are strategically placed between fingers and along the sides where the hand needs to bend and flex. Rigid materials in these areas restrict grip and finger movement, causing hand fatigue that makes kids want to quit riding earlier. The Lycra inserts allow natural hand motion without compromising protection on impact zones.
Ergonomic padding and stitching on palm for increased comfort and dexterity means O’NEAL shaped the padding to match how kids actually grip controls. Flat uniform padding causes pressure points at the base of the thumb and along the inside palm edge. The contoured padding here distributes grip pressure evenly and provides cushioning where the handlebar vibration transmits through.
Pros:
✅ Mesh ventilation prevents the sweaty-hand grip issues
✅ TPR protection in high-impact zones
✅ Adjustable closure accommodates growth
Cons:
❌ Mesh construction is less durable than full leather
❌ Sizing runs slightly small—order one size up
Price verdict: In the $18-$28 range, these gloves deliver the protection features that matter without premium pricing. You’ll replace them as kids grow rather than damage, making the budget price point appropriate for the use case.
7. O’NEAL Element Youth Boots
The O’NEAL Element Youth Boots represent the minimum investment for legitimate foot and ankle protection in junior motorcycle riding. These boots balance entry-level pricing with construction quality that prevents the injuries cheap alternatives allow.
Four-buckle closure system provides the ankle support junior riders need without the complexity of adult race boots. Each buckle creates an independent adjustment point, allowing you to customize fit around the calf, ankle, and instep. This matters because improperly fitted boots either allow excessive ankle movement (leading to sprains and breaks) or restrict it so much kids can’t work the shifter and brake properly. The four-buckle system lets you dial in the right balance.
Durable Goodyear welt sole construction means the outsole is stitched to the boot upper rather than just glued. Glued soles separate after repeated wet/dry cycles or hard impacts. The welted construction here maintains structural integrity through multiple seasons. The sole pattern is designed with specific tread channels that shed mud while providing grip on foot pegs. Smooth soles are dangerous—they slip off pegs during aggressive riding or crashes.
Metal toe guard protects the sole against delaminating at the toe box, which is where boots take the most abuse from shifter operation. Junior riders drag their toes more than experienced adults, accelerating wear at this critical point. The metal shield distributes shifter forces across a larger area and prevents the repeated impacts from separating the sole from the upper.
Proper balance with no unstable rocking means O’NEAL engineered the sole profile to keep riders stable when standing on pegs or walking around the bike. Boots with too much or too little curve at the sole create instability that makes kids work harder to maintain position on the bike. The Element’s sole profile allows natural foot positioning on pegs while providing protection.
Compatibility with MX, trail riding, adventure riding, and ATVs demonstrates the boot’s versatile design. Unlike specialized race boots optimized for one discipline, the Element works across riding styles junior riders typically explore. This versatility extends value as kids experiment with different riding types.
Pros:
✅ Four-buckle system allows precise fit adjustment
✅ Welted sole construction provides durability
✅ Metal toe guard prevents premature wear
Cons:
❌ Break-in period required—boots feel stiff initially
❌ Not as tall as full MX boots—less shin protection
Price verdict: The $100-$145 price range positions these boots above sneakers-with-guards but below premium youth MX boots around $200-$300. For recreational to intermediate riders, the Element delivers adequate protection and durability without the premium pricing of competition-focused boots. Serious racers will eventually outgrow these, but for learning and progressing, they’re the right tool.
How to Choose Kids Motorcycle Protection: A Parent’s Decision Framework
Choosing kids motorcycle protection isn’t about buying the most expensive gear or copying what the neighbor kid wears. It’s about matching protection level to your child’s actual riding context, body dimensions, and skill progression. Here’s the framework that works across different families.
Start with riding frequency and intensity. A child who rides once monthly on flat dirt trails needs different protection than one hitting jumps three times weekly. For occasional recreational riders (1-2 times monthly), focus budget on the essentials: DOT-certified helmet and basic chest protection like the StarknightMT set. For regular riders (weekly), add dedicated knee guards and proper boots. For competitive or aggressive riders (multiple times weekly), invest in articulated chest protection like the Fox Raceframe and certified knee guards like the Leatt 3DF.
Consider the riding environment. Trail riding through brush demands different protection than track riding or desert racing. Brush and trees require more arm and hand protection—upgrade gloves to models with extended cuff coverage and add elbow guards. Track riding prioritizes chest and knee protection since roost and crashes into other riders are the main threats. Desert riding needs comprehensive coverage because rocks and hard-pack ground create more severe impacts than loamy dirt.
Factor in your child’s body development stage. Kids aged 5-8 grow rapidly and proportions change—buy adjustable gear you’ll replace in 18-24 months. Ages 9-12 see slower growth—invest in higher quality that lasts multiple seasons. Teenagers (13+) approaching adult sizing can start transitioning to adult gear, which often provides better quality at similar prices to youth premium models.
Understand certification levels. DOT is the minimum for helmets in the US—every helmet you consider should have this. Snell certification adds stricter testing but is optional and adds $50-$100 to helmet costs. For body armor, CE certification under EN 1621-1 (limb protection) or EN 14021 (chest protection) indicates tested and verified impact resistance. Uncertified gear might work fine or might fail catastrophically—you won’t know until impact happens.
Prioritize fit over features. A basic chest protector that fits correctly provides more protection than a premium model worn loose or tight. Measure your child’s chest, waist, and torso length against manufacturer sizing charts. When between sizes, choose the larger size for chest and knee protection (you can tighten straps), but the smaller size for helmets (loose helmets shift during impacts). Try gear on with the riding clothes your child will actually wear—a chest protector that fits over a t-shirt might be too tight over a jersey.
Common Mistakes When Buying Kids Motorcycle Protection
The biggest mistake parents make is treating kids motorcycle protection as a one-time purchase when their child starts riding. Young riders outgrow gear rapidly, their riding skills evolve, and equipment deteriorates with use. Plan to reassess and replace protection every 12-18 months minimum, more frequently for rapid growers.
Buying gear your child will “grow into” backfires with protection equipment. Helmets that are too large shift during impacts and provide minimal protection. Chest protectors worn loose create gaps where roost and debris can enter. Boots that are too big cause blisters and prevent proper control operation. The adjustment range in kids motorcycle protection is designed to accommodate gradual growth over a season, not to fit someone who needs the next size up right now. Buy gear that fits today with adjustment room for 6-12 months of growth.
Skipping body armor because “they’re just learning on easy terrain” ignores how most injuries occur. Beginners crash more frequently than experienced riders, and protective gear prevents minor crashes from becoming trip-ending injuries. The argument that kids need to “learn to fall” without protection is dangerous—they’ll learn to fall just fine while wearing armor that prevents broken bones and road rash. Start kids in proper protection from their first ride.
Prioritizing helmet cost over fit and certification is backward thinking. A $200 poorly-fitting helmet provides less protection than a $60 properly-fitting DOT-certified option. Helmet safety depends on staying in place during impact, absorbing energy through the EPS liner, and not breaking apart. Expensive helmets often add comfort features, graphics, or brand premium—not necessarily better protection. Focus on DOT certification, proper fit, and good condition over price tag.
Reusing crashed helmets or heavily worn protection is false economy. Helmets are single-impact devices—even if there’s no visible damage, the EPS liner compresses during crashes and won’t protect properly in subsequent impacts. Chest protectors and knee guards degrade—plastic shells develop micro-cracks, foam compresses permanently, and strap systems lose elasticity. Gear that’s 3+ years old or has seen multiple crashes should be replaced regardless of appearance.
Ignoring your child’s feedback about comfort and fit creates a dangerous situation. Kids who constantly adjust their helmet, complain about chest protector tightness, or develop hot spots from boots will remove that gear when you’re not watching. Protection only works when worn correctly and consistently. If your child says equipment is uncomfortable, investigate whether it’s adjustment issues, wrong size, or gear that genuinely doesn’t fit their body shape.
Real-World Application: Matching Gear to Rider Profiles
The Weekend Warrior (Ages 5-8, Recreational Trail Riding): Your child rides 1-2 times monthly on family trail rides, mostly flat terrain with some gentle hills. Their 50cc bike tops out at 25mph, and they’re still building confidence with basic control operation.
Recommended setup: XFMT DOT-Certified Helmet ($45-$65) provides legitimate head protection without premium pricing you’ll need to replace in 18 months when they outgrow it. StarknightMT Complete Gear Set ($35-$50) covers chest, back, elbows, and knees in one purchase—perfect for infrequent riders who don’t need specialist equipment. O’NEAL Element Gloves ($18-$28) protect hands during tip-overs and brush encounters. Standard sneakers or light hiking boots work for this riding intensity—save the $100+ boots investment for when riding frequency increases.
Total investment: $100-$145. This provides genuine protection for learning basics without overinvesting in gear they’ll outgrow before wearing out.
The Developing Enthusiast (Ages 9-12, Weekly Trail/Track Riding): Your child rides weekly, mixing trail rides with occasional track days. They’re jumping small obstacles, riding in groups with other kids, and starting to push their 85cc bike harder. Crashes are becoming more frequent as they test limits.
Recommended setup: Upgrade to a higher-quality DOT helmet in the $80-$120 range with better ventilation and comfort features they’ll appreciate during longer rides. Fox Racing Youth R3 Chest Protector ($55-$75) provides CE-certified roost protection and better coverage than the StarknightMT combo. Leatt 3DF 5.0 Knee Guards ($60-$85) prevent the knee injuries common when kids start jumping and riding more aggressively. O’NEAL Element Boots ($100-$145) become necessary at this stage—ankle support prevents the sprains and breaks that occur during harder crashes. Keep the O’NEAL Element Gloves—they’re adequate at this level.
Total investment: $295-$425. This reflects the increased crash severity and frequency as skills develop. The protection quality upgrade prevents injuries that would sideline them and cost far more in medical treatment.
The Competitive Junior Racer (Ages 10-14, Multiple Weekly Rides/Racing): Your child is racing locally or regionally, practicing multiple times weekly, and pushing limits on jumps and aggressive terrain. They’re on an 85cc or small-wheel 125cc bike, riding with experienced groups, and experiencing crashes at higher speeds and impact forces.
Recommended setup: Premium DOT/Snell certified helmet in the $150-$250 range provides the maximum head protection serious riding demands. Fox Racing Youth Raceframe ($90-$120) offers articulated armor plates that competitive riders need for full range of motion without protection gaps. Leatt 3DF 5.0 Knee Guards ($60-$85) remain the correct choice—their technology handles the impact forces at this level. Upgrade to premium MX boots in the $150-$200 range that provide taller shin protection and better ankle support for competitive riding. Add premium gloves with additional knuckle protection in the $35-$50 range.
Total investment: $485-$705. This reflects competitive-level protection that prevents season-ending injuries. At this intensity level, proper equipment becomes insurance against the crashes that will inevitably occur.

Kids Motorcycle Protection vs Traditional Sports Pads: Why Specificity Matters
Parents familiar with soccer shin guards, hockey pads, or skateboarding protection often wonder why kids motorcycle protection costs more and looks different. The forces, impact types, and coverage requirements differ fundamentally between sports.
Motorcycle protection handles higher velocity impacts over sharper angles. When a soccer player collides with another player, impacts rarely exceed 10-15mph and occur into relatively soft surfaces (other players, grass). When a junior rider crashes, they’re hitting ground at 15-30mph or encountering roost from other riders at similar velocities. The impact energy scales with the square of velocity—a 20mph crash generates four times the impact force of a 10mph collision. Soccer pads aren’t engineered for these forces.
Abrasion resistance is critical in motorcycle protection but irrelevant in most field sports. Sliding across dirt, gravel, or pavement at speed creates friction injuries (road rash) that penetrate deep into tissue. Basketball or volleyball pads focus solely on impact absorption—they’ll shred instantly when sliding across abrasive surfaces. The outer shells on motorcycle protection need to resist both impact and abrasion simultaneously.
Coverage area differs based on fall dynamics. Ball sports pads protect against impacts from specific directions (front of shin, front of knee). Motorcycle crashes are unpredictable—riders can land on any body surface. Junior rider helmet requirements include full-face coverage because facial injuries are common in moto crashes but rare in other youth sports. Chest protectors wrap around to the back and cover shoulders because roost and debris come from all angles.
The adjustment and retention systems handle different motion types. Soccer shin guards stay in place during running and kicking through compression fit against the leg. But motorcycle riding involves continuous vibration, varied body positions, and occasional crashes where equipment experiences severe forces. The buckle and strap systems on moto protection are engineered to stay secure through all these conditions while allowing quick adjustment or removal when needed.
Temperature and ventilation requirements are more extreme. Field sports have breaks, substitutions, and relatively short active periods. Motorcycle riding continues for hours without stopping, often in full sun at elevated ambient temperatures plus additional heat from the engine. The ventilation systems in junior motorcycle gear are substantial because overheating causes kids to remove protection mid-ride—a safety risk that doesn’t exist in sports with regular breaks.
Long-Term Cost Analysis: Quality vs Budget Protection
The math on kids motorcycle protection is more nuanced than simply comparing price tags. When you factor in replacement frequency, protection effectiveness, and injury costs, the value equation shifts.
Budget protection ($150-$250 for complete kit) needs replacing every 12-18 months due to outgrowing plus quality deterioration. The materials degrade faster—foam compresses permanently, plastic develops stress cracks, and straps lose elasticity. Calculate $150-$250 annual replacement cost, plus the risk of injuries from protection that fails or doesn’t properly fit growing bodies.
Mid-range protection ($350-$450 for complete kit) lasts 18-24 months with proper maintenance. The better materials maintain protection properties through multiple seasons. Adjustment systems accommodate more growth range, extending usable life. Calculate $175-$225 annual equivalent cost, with significantly reduced injury risk from better fit and protection quality.
Premium protection ($550-$750 for complete kit) uses materials and engineering that can last 2-3 years if your child’s growth rate allows. The articulated designs and extensive adjustment mean you’re not replacing because gear no longer fits correctly. Calculate $185-$250 annual equivalent cost—remarkably similar to budget options but with maximum injury prevention.
Now factor injury costs. A broken collarbone from inadequate chest protection costs $5,000-$15,000 in emergency care, orthopedic follow-ups, and potential surgical intervention, plus weeks of missed riding and activities. A concussion from a substandard helmet runs $3,000-$8,000 in imaging, neurology consultations, and monitoring, plus the long-term questions about brain development. A torn ACL from knee impact without proper guards costs $20,000-$35,000 in surgery and rehabilitation, plus 6-12 months recovery.
When you include even a modest probability of serious injury, spending an additional $200-$300 on quality protection generates massive positive returns. A 10% reduction in serious injury risk (a conservative estimate) at $10,000 average injury cost creates $1,000 in expected value savings—far exceeding the premium paid for better equipment.
The practical calculation: invest in mid-range to premium chest, knee, and helmet protection. These three items prevent the majority of serious injuries. Budget options for gloves and boots are acceptable at recreational riding levels since injuries to extremities, while painful, rarely require extensive medical intervention.
Maintenance and Inspection: Extending Protection Life and Effectiveness
Kids motorcycle protection deteriorates through use and requires regular maintenance to maintain safety performance. Most families skip this step and discover protection failed when it’s too late.
Helmet inspection should occur after every significant crash and monthly during riding season. Examine the shell for cracks, especially around mounting points for visors or hardware. Squeeze the EPS liner inside—it should spring back firmly. If it stays compressed or feels mushy, the liner is damaged and won’t protect properly. Check the retention strap and chin buckle for wear or looseness. Inspect the foam padding—compressed or torn padding allows the helmet to shift. Replace any helmet after a significant impact, after 3-5 years regardless of visible condition, or when your child outgrows it.
Chest protectors and body armor need inspection before each riding session. Check plastic shells for cracks, particularly around stress points like strap attachment areas. Flex the shells slightly—they should return to shape without cracking sounds. Examine foam padding for compression that doesn’t recover. Test all buckles and straps—they should click securely and hold under tension. Look for tears in fabric or stitching failure. Clean armor after dusty or muddy rides by wiping shells with damp cloth and allowing to air dry completely. Don’t machine wash rigid armor—it can warp plastic shells and separate laminated layers.
Knee and elbow guards require similar attention. Inspect the hard caps for cracks or warping. Check the rear elastic and straps—they should maintain tension without being overstretched. Replace guards when elastic no longer holds them in position during riding. Clean according to manufacturer instructions—most allow hand washing but not machine drying, which degrades elastic fibers.
Gloves and boots have different maintenance needs. Gloves should be hand washed in cool water with mild soap, then air dried. Machine washing destroys the palm padding and mesh panels. Inspect stitching at stress points like between fingers and at the wrist closure. Replace gloves when the palm padding compresses flat or stitching begins separating.
Boots require cleaning after muddy rides to prevent premature material breakdown. Remove packed mud from tread and around buckles before it hardens. Apply leather conditioner to leather boots or armor-all type protectant to synthetic boots to prevent cracking. Check buckle function and strap condition—replace buckles that won’t hold or straps showing fraying. The sole-to-upper bond is critical—examine where they join for separation. Any gap means the bond is failing and the boot should be replaced.
Storage matters for protection longevity. Don’t leave gear in vehicles where temperature extremes accelerate material degradation. UV exposure fades colors and weakens plastics—store in dark locations. Avoid compressing armor or helmets under heavy items, which can deform protective structures. Hang or lay gear flat to maintain shape.
Safety Certifications Decoded: What Parents Need to Know
The alphabet soup of safety certifications on kids motorcycle protection confuses most parents. Here’s what actually matters and what’s marketing fluff.
DOT (Department of Transportation) is the mandatory federal standard for motorcycle helmets sold in the US. DOT certification under FMVSS 218 requires helmets to pass impact attenuation tests, penetration resistance tests, retention system tests, and peripheral vision tests. Critically, DOT is self-certified—manufacturers test their own products and affix the DOT sticker. The NHTSA randomly purchases and tests helmets to verify compliance, but this catches violations after products are already on the market.
What this means for parents: DOT certification is the absolute minimum. Every helmet you consider should have the DOT sticker. It doesn’t guarantee the highest protection level, but it ensures basic safety requirements are met. Never buy a helmet without DOT certification regardless of other claims.
Snell Memorial Foundation certification is voluntary but represents more stringent testing than DOT. Snell standards include multiple impact tests (DOT only requires one), more demanding impact energy requirements, and positional impact testing. Snell certification is independent—helmets are submitted for testing by a third party, not self-certified. Current standards are Snell M2025 for adult motorcycle helmets and CMR2016 for youth helmets.
What this means for parents: Snell-certified helmets provide measurably better protection than DOT-only helmets. The additional $50-$100 cost for Snell certification buys stricter testing and independent verification. For aggressive riders or families who can afford the premium, Snell adds meaningful value.
ECE 22.06 is the European standard recognized in over 50 countries. It requires more extensive testing than DOT but is generally considered comparable to Snell. ECE certification is legal in the US though not required. The test protocols include oblique impacts (side impacts at an angle) that DOT and Snell don’t assess.
What this means for parents: ECE-certified helmets sold in the US provide quality protection. The certification is trustworthy and indicates international-level safety standards. ECE helmets are often well-priced because manufacturers produce them in higher volumes for global markets.
CE EN 1621-1 is the European standard for limb protection (knee guards, elbow guards). It specifies maximum force transmission through the protective material during impacts, meaning the armor must absorb enough energy that what reaches your child’s joint falls below injury thresholds. Level 1 and Level 2 certifications exist—Level 2 offers higher protection.
What this means for parents: CE-certified knee and elbow guards have been independently tested and verified. Look for CE EN 1621-1 Level 2 on limb protection when available. It’s the best verification that guards will actually protect during impacts rather than just look protective.
CE EN 14021 is the European standard for back protectors and chest protectors. Similar to 1621-1, it specifies maximum force transmission and requires the protector to distribute impact forces across a wide area. The certification includes testing for coverage area, edge effects, and ergonomic fit.
What this means for parents: Chest and back protectors with CE EN 14021 certification provide verified protection. The Fox R3 and Raceframe both carry this certification, distinguishing them from uncertified budget protectors. For serious riders, this certification is worth seeking.
The harsh truth: Many budget protection items carry no certification whatsoever. The foam padding and plastic shells might provide some protection, or they might compress/crack on first impact and offer nothing. Without certification, you’re guessing. For helmets, certification is legally required. For body armor, it’s optional but worth prioritizing.
According to research from the Centers for Disease Control and Prevention, properly certified protective equipment reduces serious injury risk by 37-65% across different injury types. The Federal Motor Vehicle Safety Standards provide the framework for helmet testing and compliance that ensures baseline protection levels.

Sizing Guide: Getting the Fit Right Across Age Groups
Proper sizing is where most families get kids motorcycle protection wrong. Gear that’s too large shifts during riding and provides minimal protection. Gear that’s too small restricts movement and circulation, causing discomfort that motivates kids to remove it.
Helmets demand the most precise sizing. Measure your child’s head circumference at the widest point—typically just above the eyebrows and ears. Use a soft measuring tape pulled snug but not tight. Compare this measurement to the manufacturer’s size chart for that specific helmet model—sizing varies between brands. When between sizes, choose the smaller size for helmets since the EPS liner compresses slightly during initial use.
Test fit by having your child put on the helmet while it’s unbuckled. It should slide on snugly with some resistance—if it drops on easily, it’s too large. The helmet should sit level, not tilted back or forward. Check that cheek pads contact the cheeks evenly without causing bunching or pressure points. The front edge should sit about an inch above the eyebrows. Buckle the retention strap snugly and try to roll the helmet off from the back—a properly fitted helmet won’t move more than an inch in any direction. Your child should be able to open their mouth wide and feel the helmet pull down slightly on their head—this indicates proper cheek pad fit.
Chest protectors size by torso dimensions. Measure chest circumference at the widest point (typically at armpit level), waist circumference at the natural waistline, and total torso length from shoulder to waist. Youth chest protectors come in size ranges (small, medium, large) that correspond to age ranges, but individual body proportions vary significantly. Use the specific measurements against manufacturer charts rather than relying on age guidelines.
Test fit by having your child put on the chest protector over the shirt or jersey they’ll ride in. Adjust all straps to achieve even pressure distribution—no single strap should be significantly tighter than others. The chest plate should sit centered on the sternum and extend from approximately the collarbone to just below the rib cage. Side panels should wrap around toward the back without gaps but not so tight they restrict breathing. The shoulder straps should keep the protector from bouncing when your child jumps but not pull so tight they restrict shoulder movement. Have them move through riding positions—leaning forward, twisting side to side, reaching forward like grabbing handlebars. The protector should stay in place without binding.
Knee guards are sized by knee circumference and thigh/calf circumference. Measure around the kneecap with the leg slightly bent, around the thigh 6 inches above the kneecap, and around the calf 6 inches below the kneecap. Most youth knee guards use a combination of measurements to determine size.
Test fit with your child standing. The hard cap should center directly over the kneecap with no shifting when they bend and straighten the leg. Top and bottom straps should hold the guard in place without cutting into the leg—you should be able to slide a finger under the strap comfortably but not much more. Have them walk, squat, and kneel—the guard should stay centered without rotating or sliding. If the top strap needs to be very tight to prevent the guard from sliding down, the size is too large.
Gloves size by hand length and palm width. Measure from the base of the palm to the tip of the middle finger with the hand flat. Measure palm width across the widest part. Youth glove sizes typically range from 3 to 7, though sizing conventions vary by manufacturer.
Test fit by having your child fully insert their hand and spread fingers wide—fingertips should reach close to the end of each glove finger without bunching or pulling. Make a fist—the glove should allow full finger curl without the palm material bunching excessively. Grip something cylindrical like a broom handle—the palm padding should contact evenly without gaps. The wrist closure should adjust snug enough to prevent the glove sliding around during riding.
Boots require multiple measurements. Foot length from heel to longest toe, calf circumference at the widest point, and ankle circumference are all relevant. Youth MX boots typically use standard shoe sizes but proportions vary.
Test fit with the riding socks your child will wear. Insert their foot fully—toes should not touch the front of the boot, leaving about half an inch of space. Stand up and buckle all four buckles starting from the bottom and working up. The boot should feel snug around the ankle and lower shin without pain or numbness. Walk around—the heel should lift slightly but not excessively. Flex the foot up and down and side to side—the boot should provide resistance and support without completely preventing ankle movement. Try operating clutch and brake levers (if possible on their bike)—the boot should allow enough ankle flex for control operation.
Junior Rider Protection for Different Riding Styles
The optimal kids motorcycle protection varies based on riding discipline because crash types, speeds, terrain, and injury risks differ substantially.
Trail riding emphasizes protection against environmental hazards—trees, rocks, stumps, and uneven terrain. Junior riders move at lower speeds (5-20mph typically) but encounter obstacles constantly. Priority protection areas are hands, arms, and legs since brush and branches cause most impacts.
Essential gear: Full-face DOT helmet with good ventilation for all-day comfort. Mid-level chest protector like the Fox R3 that covers front, back, and shoulders but doesn’t restrict the twisting motion trail riding requires. Knee guards are mandatory because log crossings and rock gardens create frequent knee impacts. Gloves with extended cuff coverage and reinforced knuckles prevent branch injuries. Boots with good ankle support but lighter weight than full MX boots since trail riders walk sections frequently.
Motocross track riding involves higher speeds (20-40mph), jumps, and roost from other riders. Crashes happen at speed into dirt berms, jump faces, or from mid-air collisions. Head, chest, and knee protection are critical.
Essential gear: DOT/Snell certified helmet since impact velocities are higher. Articulated chest protector like the Fox Raceframe that protects from roost while allowing the extreme body positioning MX requires. Knee guards with hard caps and wraparound coverage because knee impacts into the ground or bike are common. Premium MX boots with full shin protection and firm ankle support for the repeated impacts from landings and crashes.
Desert and open terrain riding combines high speeds (25-50mph) with unpredictable terrain including rocks, sand, and hard-pack dirt. Heat is a major factor. Crashes are less frequent than track riding but higher consequence when they occur.
Essential gear: Lightweight DOT helmet with maximum ventilation—desert riding in summer heat quickly causes exhaustion. Full chest and back protection because high-speed crashes into hard-pack or rocks cause severe injuries. Knee and shin guards that provide comprehensive coverage. Ventilated gloves and lighter boots since riders cover long distances and heat management is critical. Consider adding kidney belt protection for older junior riders on bigger bikes.
Casual riding (pit bikes, riding on property) involves lowest speeds (5-15mph) and controlled environments, but parents often skip protection here—a mistake since most beginner crashes occur in exactly these conditions.
Essential gear: DOT helmet absolutely mandatory regardless of speed or location. Basic chest protector like the StarknightMT combo provides adequate protection at these speeds. Standard knee pads acceptable. Gloves prevent hand injuries. Boots important for ankle support even at low speeds since tip-over crashes still cause ankle injuries.
Frequently Asked Questions
❓ What size motorcycle helmet should I buy for my 8-year-old?
❓ Do kids really need chest protectors for trail riding?
❓ How often should I replace my child's motorcycle helmet?
❓ What's the difference between DOT and Snell certified helmets for kids?
❓ Can my child wear adult motorcycle protection gear in smaller sizes?
Conclusion: Investing in Protection That Grows With Your Rider
The decision to equip your junior rider with proper kids motorcycle protection isn’t really a decision at all—it’s an obligation that comes with handing your child the keys to a powered vehicle. The question isn’t whether to buy protection, but which level of protection matches your child’s riding intensity and your family’s budget.
What this comprehensive analysis reveals is that adequate protection exists at multiple price points. The family starting their 6-year-old on a 50cc bike with trail riding twice monthly can genuinely protect them with $150-$200 in basic certified equipment. The competitive junior racer needs the $500-$700 investment in premium articulated gear and advanced helmet technology. Both approaches are valid when matched to actual riding conditions.
The protection items you cannot compromise on are the helmet, chest protector, and knee guards. These three prevent the majority of serious and fatal injuries in junior motorcycle crashes. Spend 70% of your protection budget on these core items, then allocate remaining funds to gloves and boots based on riding frequency and intensity.
Remember that kids motorcycle protection is a recurring investment, not a one-time purchase. Plan to reassess and replace equipment every 12-24 months as your child grows and their riding skills evolve. The StarknightMT set that’s perfect for an 8-year-old beginner becomes inadequate for a 10-year-old hitting jumps regularly. Adjust protection quality and coverage as riding intensity increases.
The proper mindset isn’t treating protection gear as an optional enhancement or something your child will “grow into needing.” From the first time they twist that throttle, comprehensive protection should be as non-negotiable as the helmet itself. The best riders in the world—professionals paid millions to ride—wear maximum protection every time they ride. If protection makes sense for them, it certainly makes sense for your still-learning junior rider.
Start with certified equipment that fits today, maintain it properly through the season, and upgrade as your child’s skills and riding style demand. The investment you make in proper kids motorcycle protection today prevents the medical bills, permanent injuries, and lost riding seasons that inadequate protection allows tomorrow.
Recommended for You
- 7 Best Quad Riding Helmets That Crushed Safety Tests in 2026
- 7 Best Enduro Racing Helmets That Crush Technical Trails (2026)
- 7 Best Street-Legal Off-Road Helmets: DOT Certified Guide 2026
Disclaimer: This article contains affiliate links. As an Amazon Associate, I earn from qualifying purchases. If you purchase products through these links, we may earn a small commission at no additional cost to you.
✨ Found this helpful? Share it with your friends! 💬🤗